Easy Dollhouse Wood Floor Tutorial

At this point in my dollhouse career, I have made 4-5 different wooden floors. One of my favorite methods for a life-like look is to use pre-glued wood veneer strips (Wood Veneer Floor Details here). However, many people use popsicle sticks or coffee stirrers and I decided to take a stab at it. It’s actually very easy and straightforward! All you need are wood strips, wood glue, and some sort of base. See the full tutorial below.
Materials
Bamboo Coffee Stirrers (I like these with the straight ends)
Cardstock or Chipboard (some sort of heavy duty paper as the base)
Small foam brush or foam applicator
Wood stain and/or sealer
Wood Flooring DIY
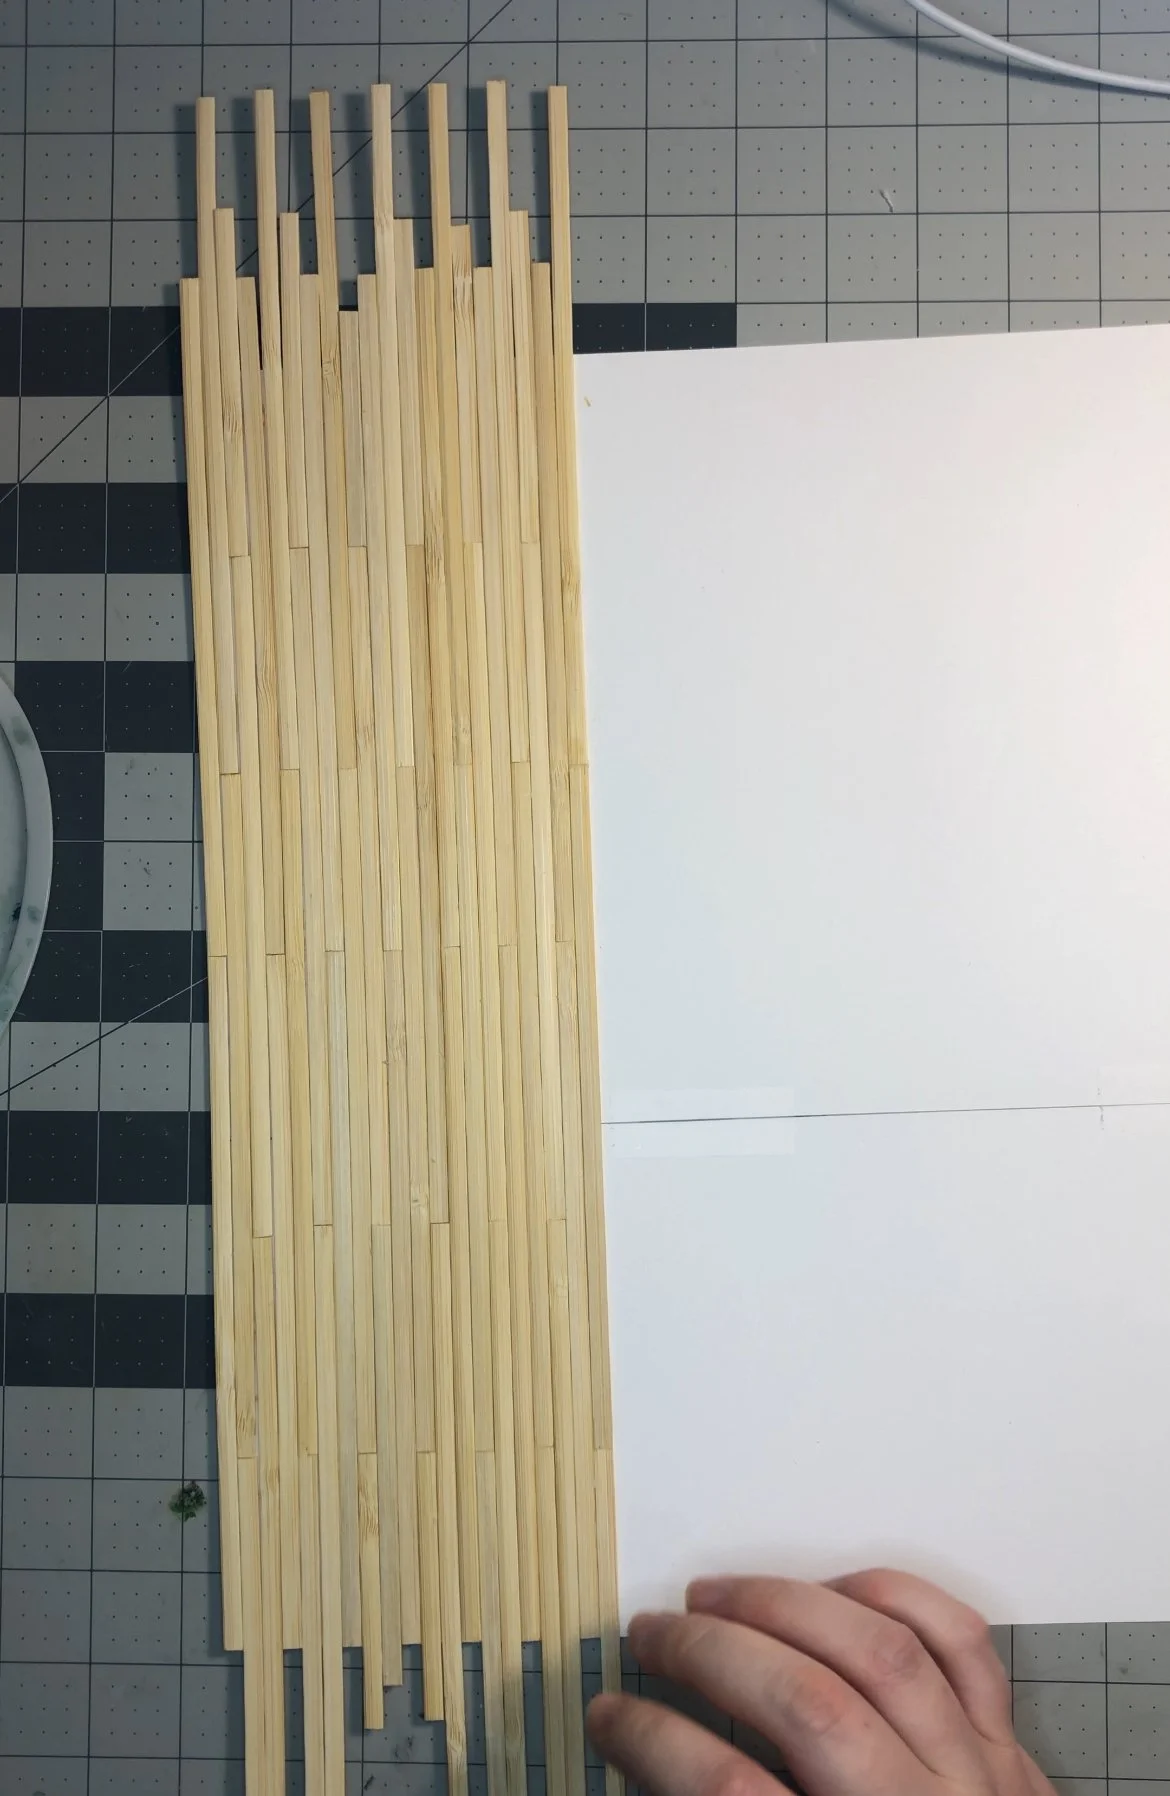
Measure out the space for your wood floor and make a base out of heavy paper like cardstock. Tape together multiple pieces of paper together if needed. Do a dry fit of your paper base inside your room to make sure you have a good fit. Some rooms aren’t perfectly square or need notches for stairs or doorways. Make those necessary marks on your template, and label the bottom of the paper to remember which way it should slide in. Decide which way you want the floor slats to run. Typically, your wood slats should run parallel to the longest edge of the room, but be sure to consider any neighboring rooms and their floor configurations.
Put a good size glob of wood glue in a small bowl, artist’s palette, or spare piece of paper. Dip your foam brush into the glue and apply to one end of you paper base. I only worked in small sections as you don’t need that much glue and it tends to dry quickly. Begin placing your wood stirrers along one edge of the paper, keep flush with the edge, and complete one full row before moving to the next.
When starting the next adjacent row of sticks, position your first strip 1/3 of the way higher than the previous strip. This will stagger the seams and create a more realistic layout. The next row will start 2/3rds up from the first row. Then the next row will start back at the flush position. You can do a different stagger pattern that suits your style.
Double check your wood sticks to make sure they are straight. Some of mine were a little crooked or curved out of the box. Save those to trim down as end pieces or scraps. Use only the straightest pieces for full strips.
As needed, use miter shears to trim pieces or create small pieces to fill the 1/3 and 2/3 spaces left over.


Continue gluing down one row at a time and pressing the wood strips in place. Once you are done, you can trim off the overhanging edges with some super heavy duty scissors like tin snips. Give the edges and the surface a couple good passes with sandpaper.
At this point you can stain your floor or leave it unfinished wood. I used a medium-to-dark wood stain on mine and then covered it with a satin poly for some shine. Let it dry for a full 24 hours before putting it anywhere near your dollhouse. When installing in your dollhouse or room box, glue your floor piece down with wood glue, paying extra attention to the edges and corners. Use weights or paperweights to hold it down while it dries.


Can I glue my wood floor directly to my dollhouse?
Yes, you certainly can glue the individual wood strips directly inside the dollhouse. However, I find this is unnecessarily difficult and especially hard to pay attention to the details and straight lines. By gluing onto a separate base, you can work easily nearby and then glue the finished piece down all together.
Can I use popsicle sticks to make a dollhouse floor?
Yes, however, popsicle sticks often have rounded edges which you will need to trim off. This will be tedious but doable!

I used my wood floor in a small room box with the upholstered beds I made. How will you use yours? Tag me in your creations on social media!