Dollhouse Wardrobe Tutorial

This wardrobe may be one of my favorite furniture makes to date! It’s relatively easy actually, with straight pieces and a simple basswood box, so even beginner dollhouse crafters can make their own version. You’ll find instructions below for the tutorial as well as a PDF download of cut lists and templates.
Materials
3/32” thick basswood sheet
1/16” thick basswood sheet
Bamboo kabob skewer, 1/8” diameter
Wood glue
Paint
Hand saw
X-Acto knife
Metal Ruler
Sand paper
Note: Basswood is not the same a balsa wood. Balsa wood is much softer and porous. I prefer to work with basswood.
1:12 Scale DIY Wardrobe Instructions
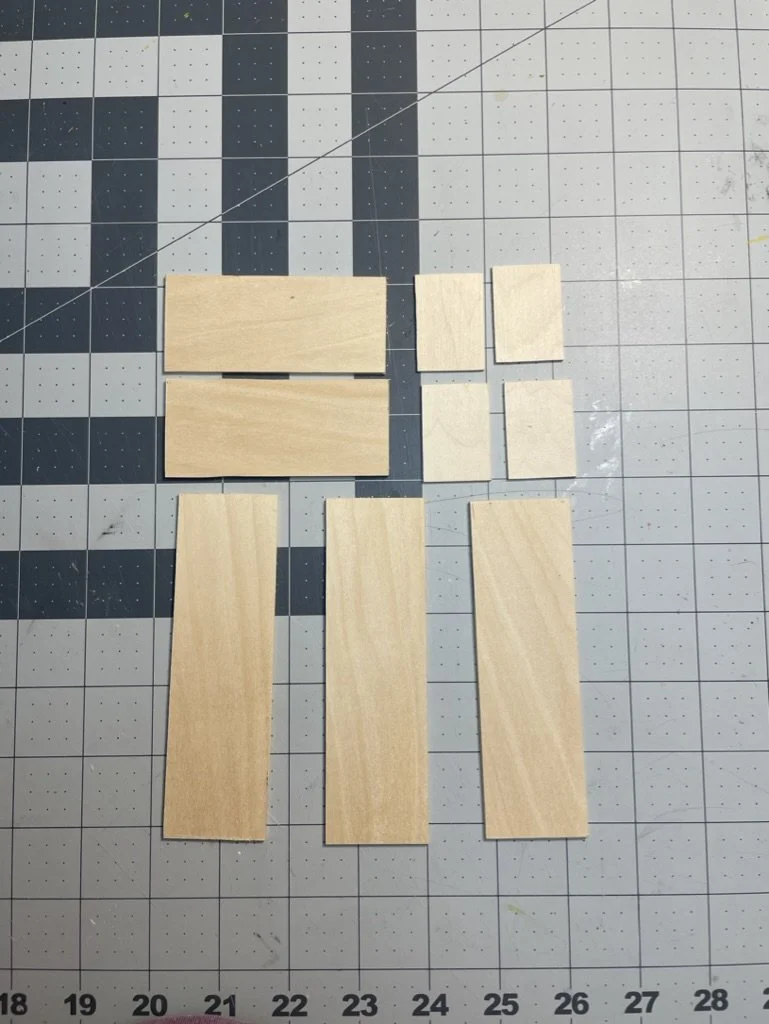
Use the PDF download below to cut out each piece of basswood. I have chosen a thicker sheet for the main structure walls and a thinner sheet for the shelving. You can do the same thickness throughout if desired.
Wardrobe Cutting List PDF Download
Cut out the necessary pieces of basswood using an X-acto knife or hand saw. Sand down any rough edges.
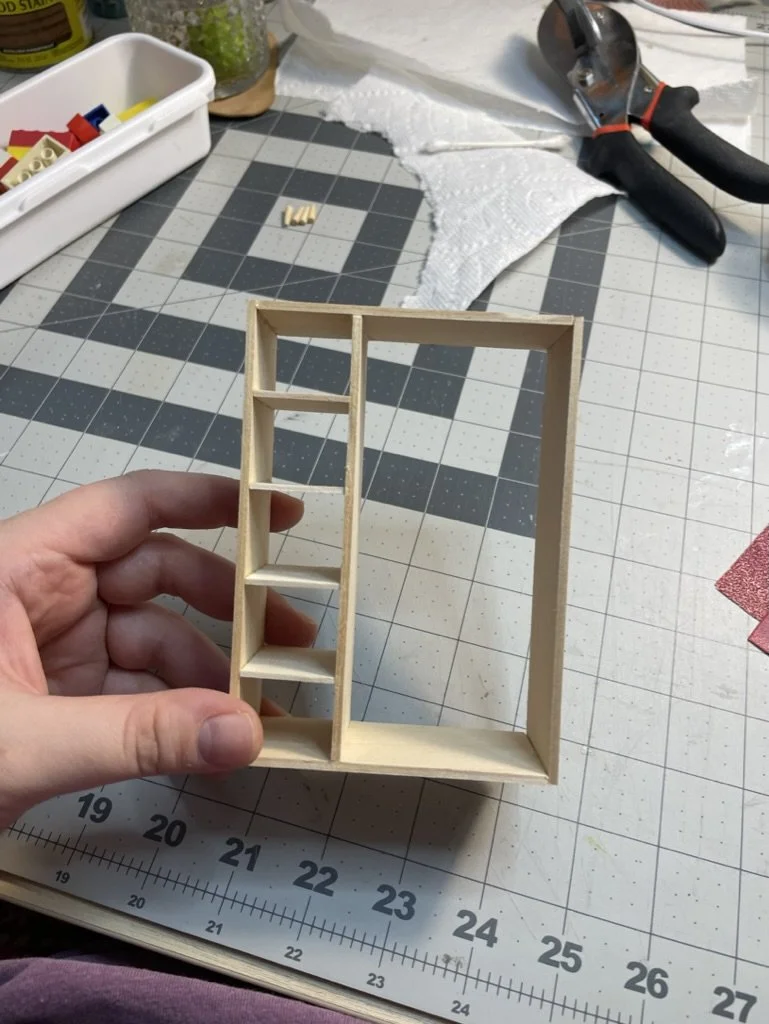
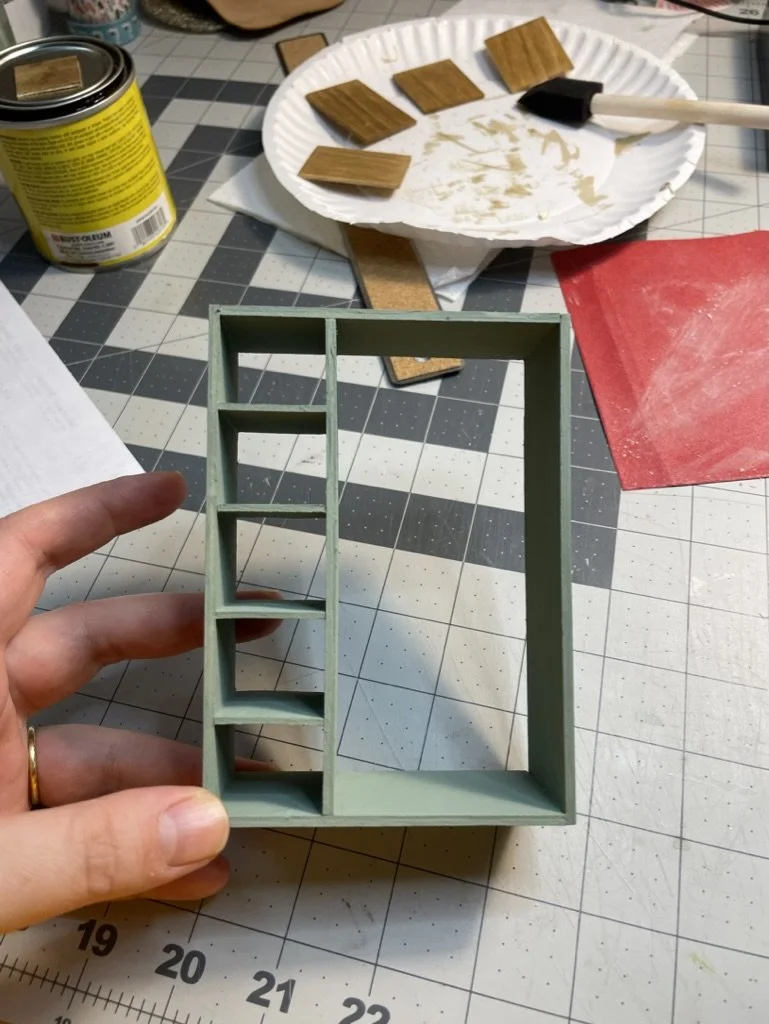
With a dab of wood glue on each connection, assemble the outside walls to form a box. The top and bottom pieces should fit inside the vertical pieces (see the PDF page 2 for assembly). Use Lego blocks to make sure you have right angles while the glue dries.
Next, add the horizontal shelves alongside one edge. These should be evenly spaced out with approximately 1 in between each shelf. Add wood glue to the other sides of the shelves, and slide the inner vertical wall in place. Make sure these are all right angles as well. And clean up any glue that may have squeezed out by running a toothpick along the edges.
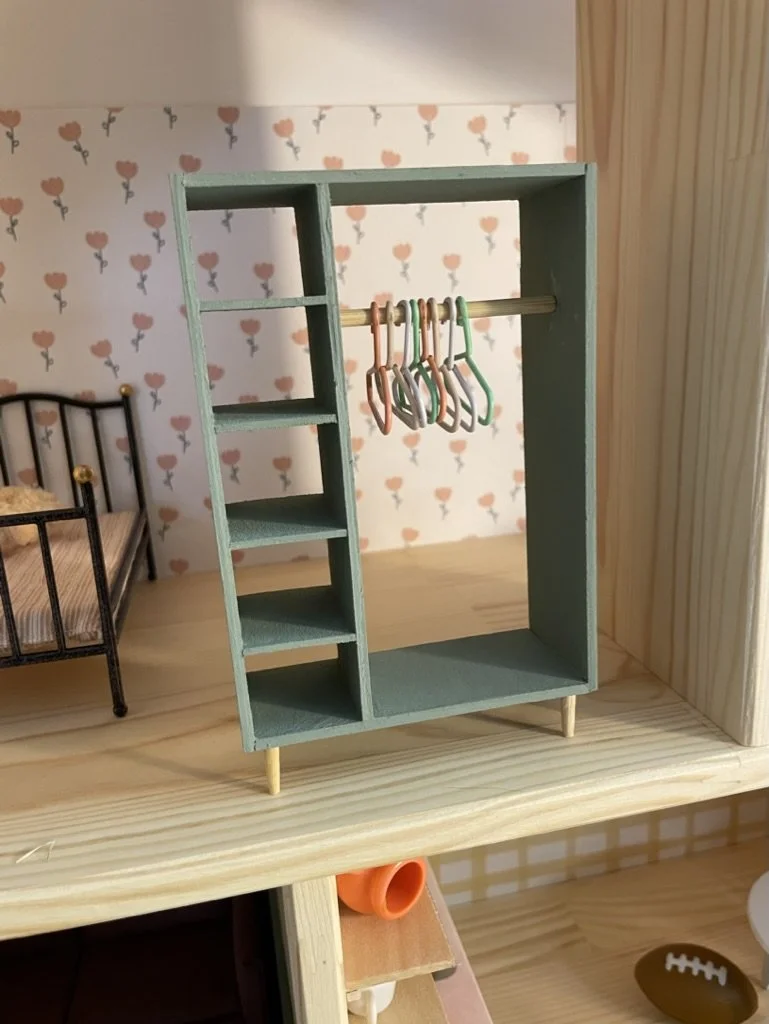
I wanted to keep the legs and clothing rod as unfinished wood, so I painted my wardrobe box at this point. You can paint now (like I did) or wait for the final assembly if you want everything painted the same color.
Cut the pointed ends off bamboo kabob skewers and sand down the pointed part to give the legs a flat edge. Cut your clothing rod as well (miter cut shears come in handy here.) I cut mine a little on the long side and then sanded it down for a tighter fit inside the wardrobe.

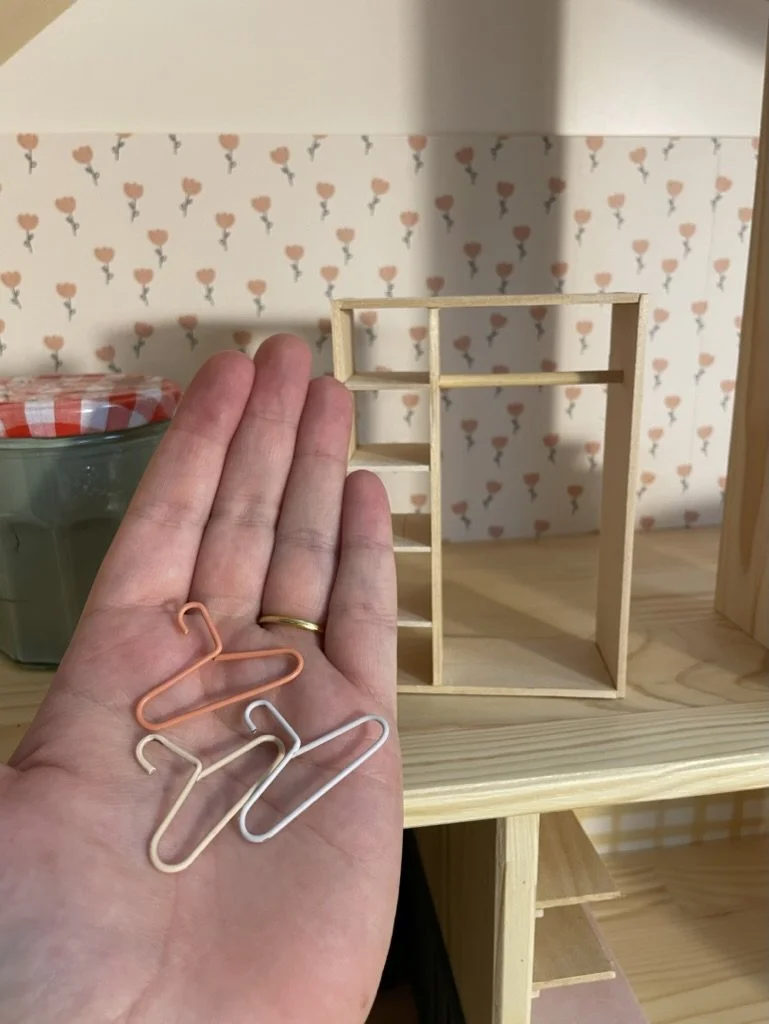
Glue the legs onto the bottom of the wardrobe, and glue the clothing rod into the upper quarter of the wardrobe hanging space. I made some quick clothing hangers from colored paper clips I luckily found in my desk.
Your wardrobe is now done and ready to be filled with tiny doll clothing! Be sure to tag me in your creations on Instagram!