How to Sew Dollhouse Pillows
With a basic understanding of sewing, you can make tiny pillows for your dollhouse. Experiment with shapes and sizes for what fits your use. The great thing is, dollhouse pillows require very little fabric, so go through your donated clothes bags and fabric scraps to find your project materials. Let’s get started!
Pillow Materials
Fabric - 4”x4” inches or less scraps
Stuffing, Poly-fil, etc - or just grab a tiny bit from the inside of a throw pillow you already have
Needle & coordinating thread
Optional: Sewing machine
Other supplies: scissors, ruler
Square Pillows
Cut Out Materials & Sew
Cut out your pillows from your fabric. For mine, I did a 2” x 2” square and a 2.5” x 1.5” rectangle. You’ll cut two pieces of fabric out per pillow.
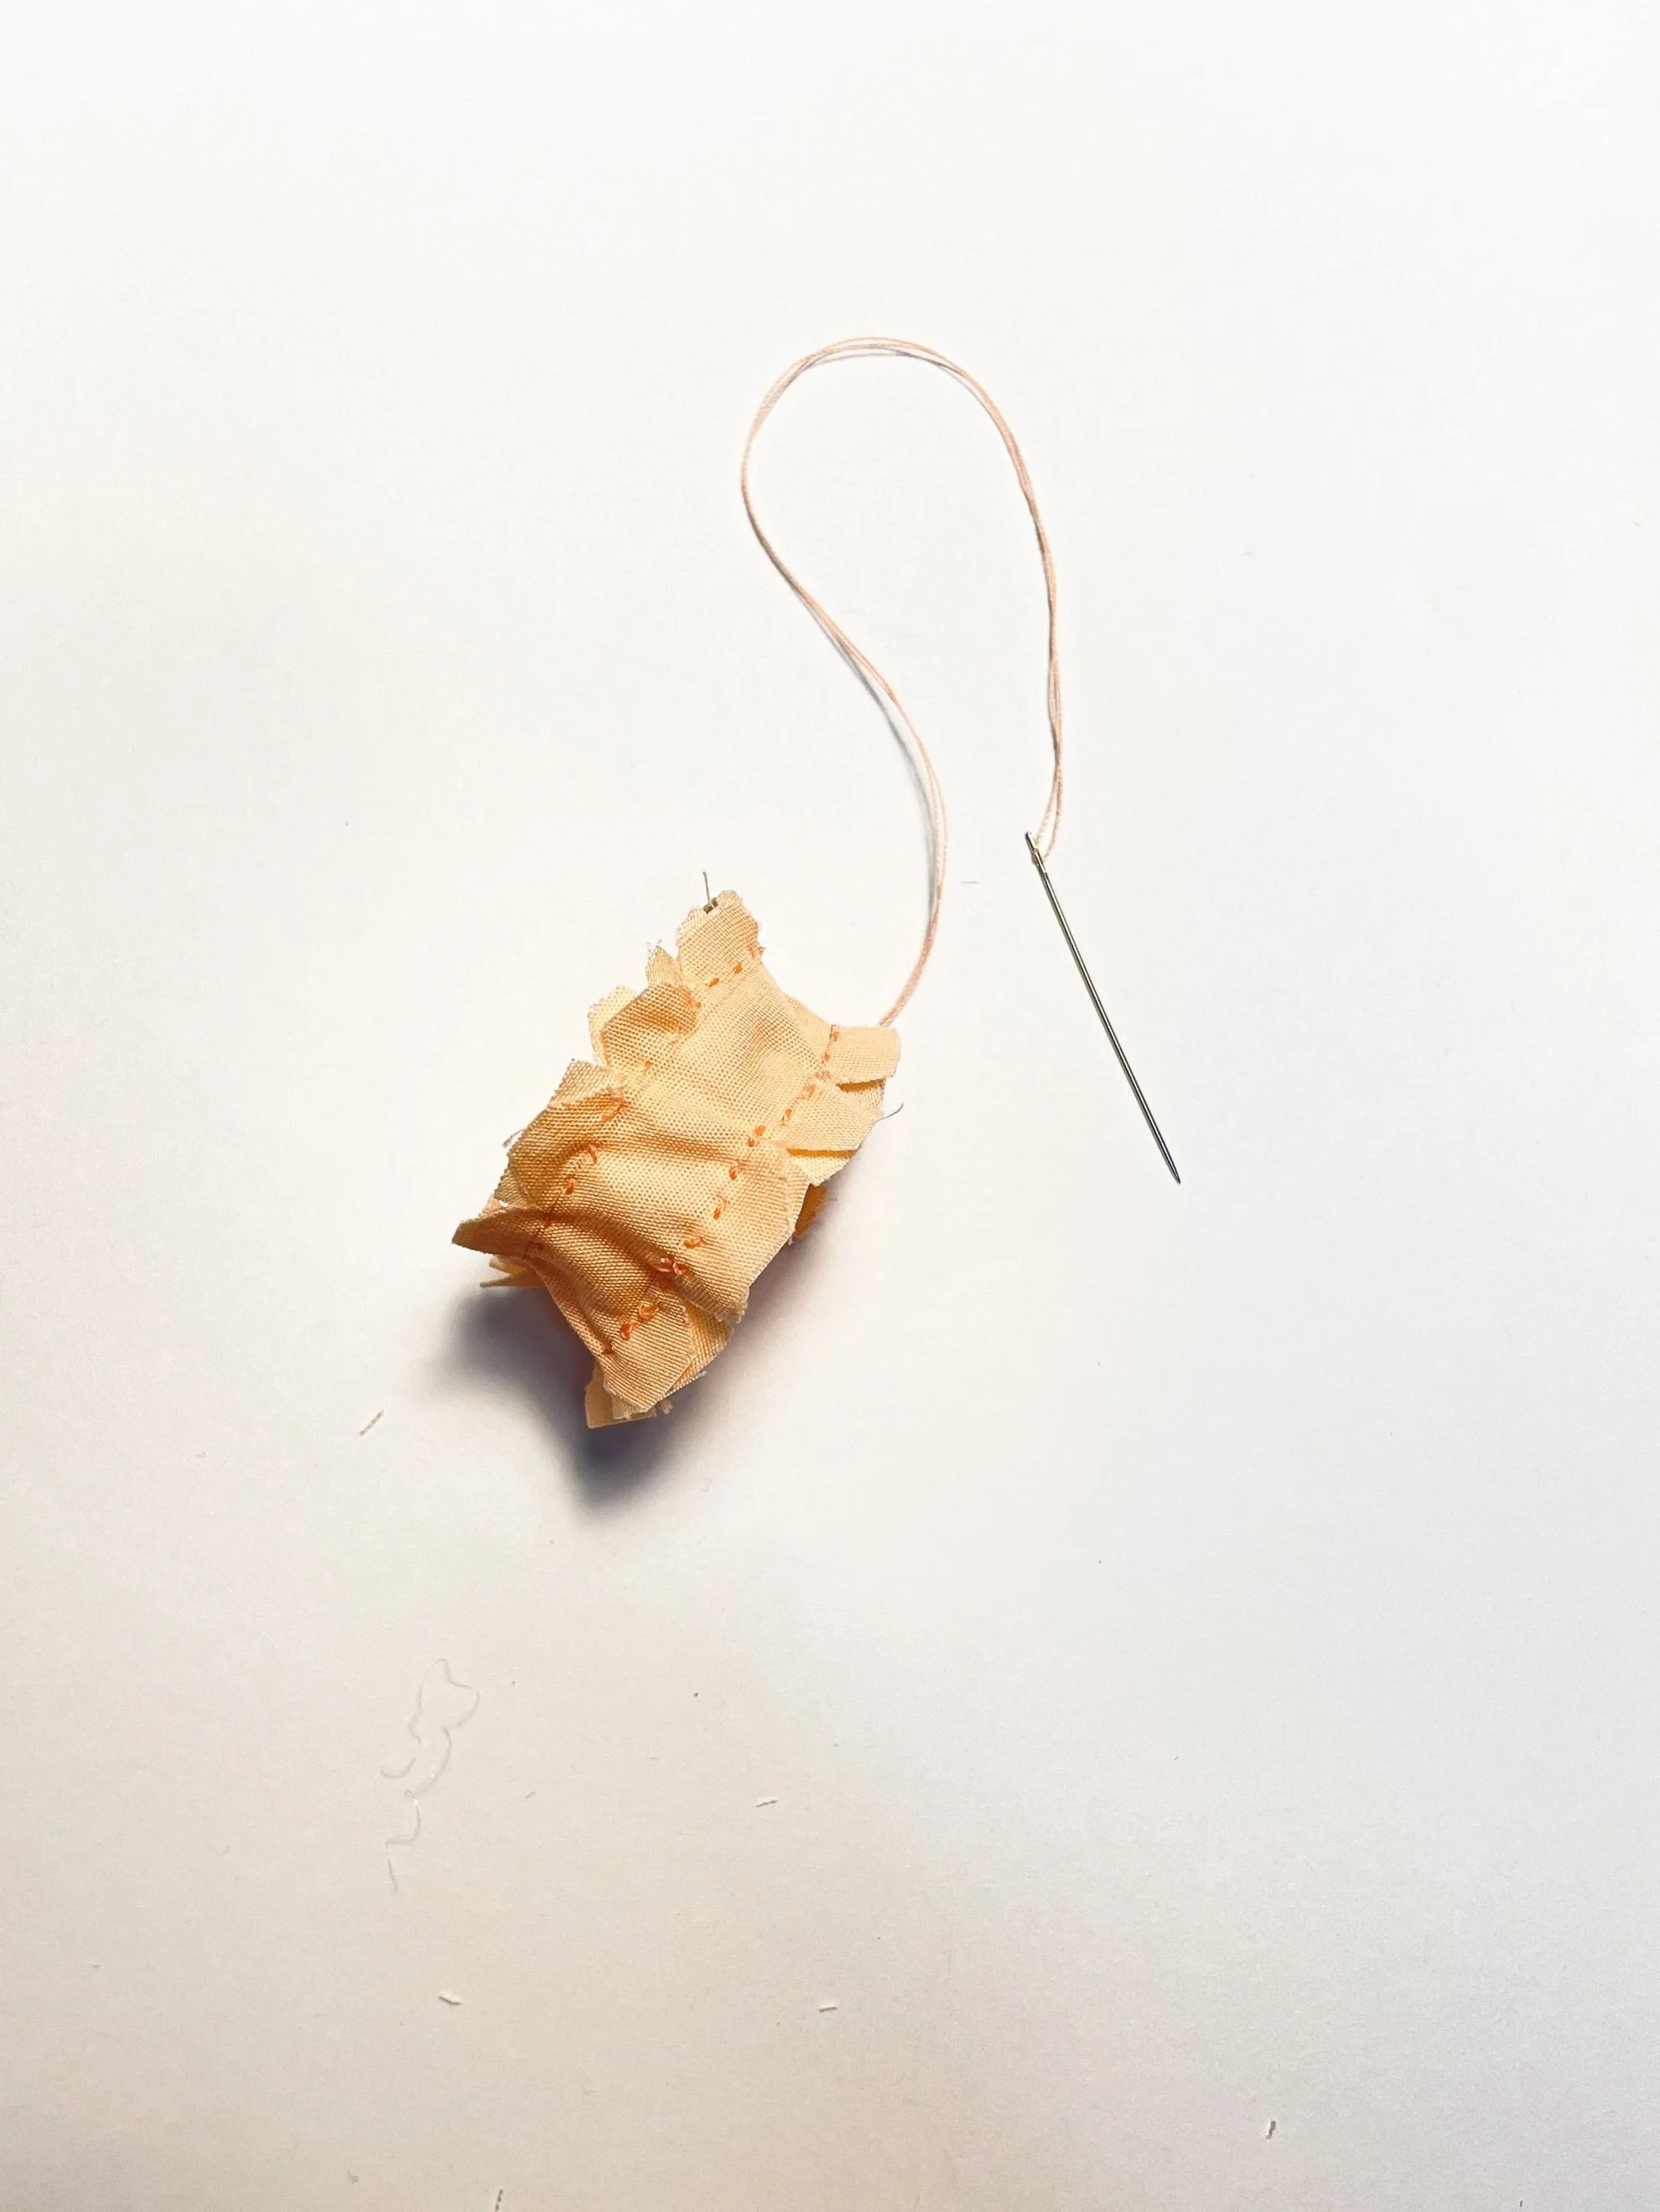
Place them right sides together and pin in the center. Next, sew along the sides at about a 1/4” from the edge. Leave an opening unsewn on one side so you can turn the pillow right side out at the end. You can use a sewing machine or sew by hand.
Trim your corner at a 45" degree angle before turning your pillows right side out.


Stuff Pillows and Finish Open Seam
4. Turn your pillows right sides out by using the opening in the seam you made. Using something pointed, push the corners out to make them as flat and pointy as possible. I use the scissor point of my thread snips to push out tiny corners.
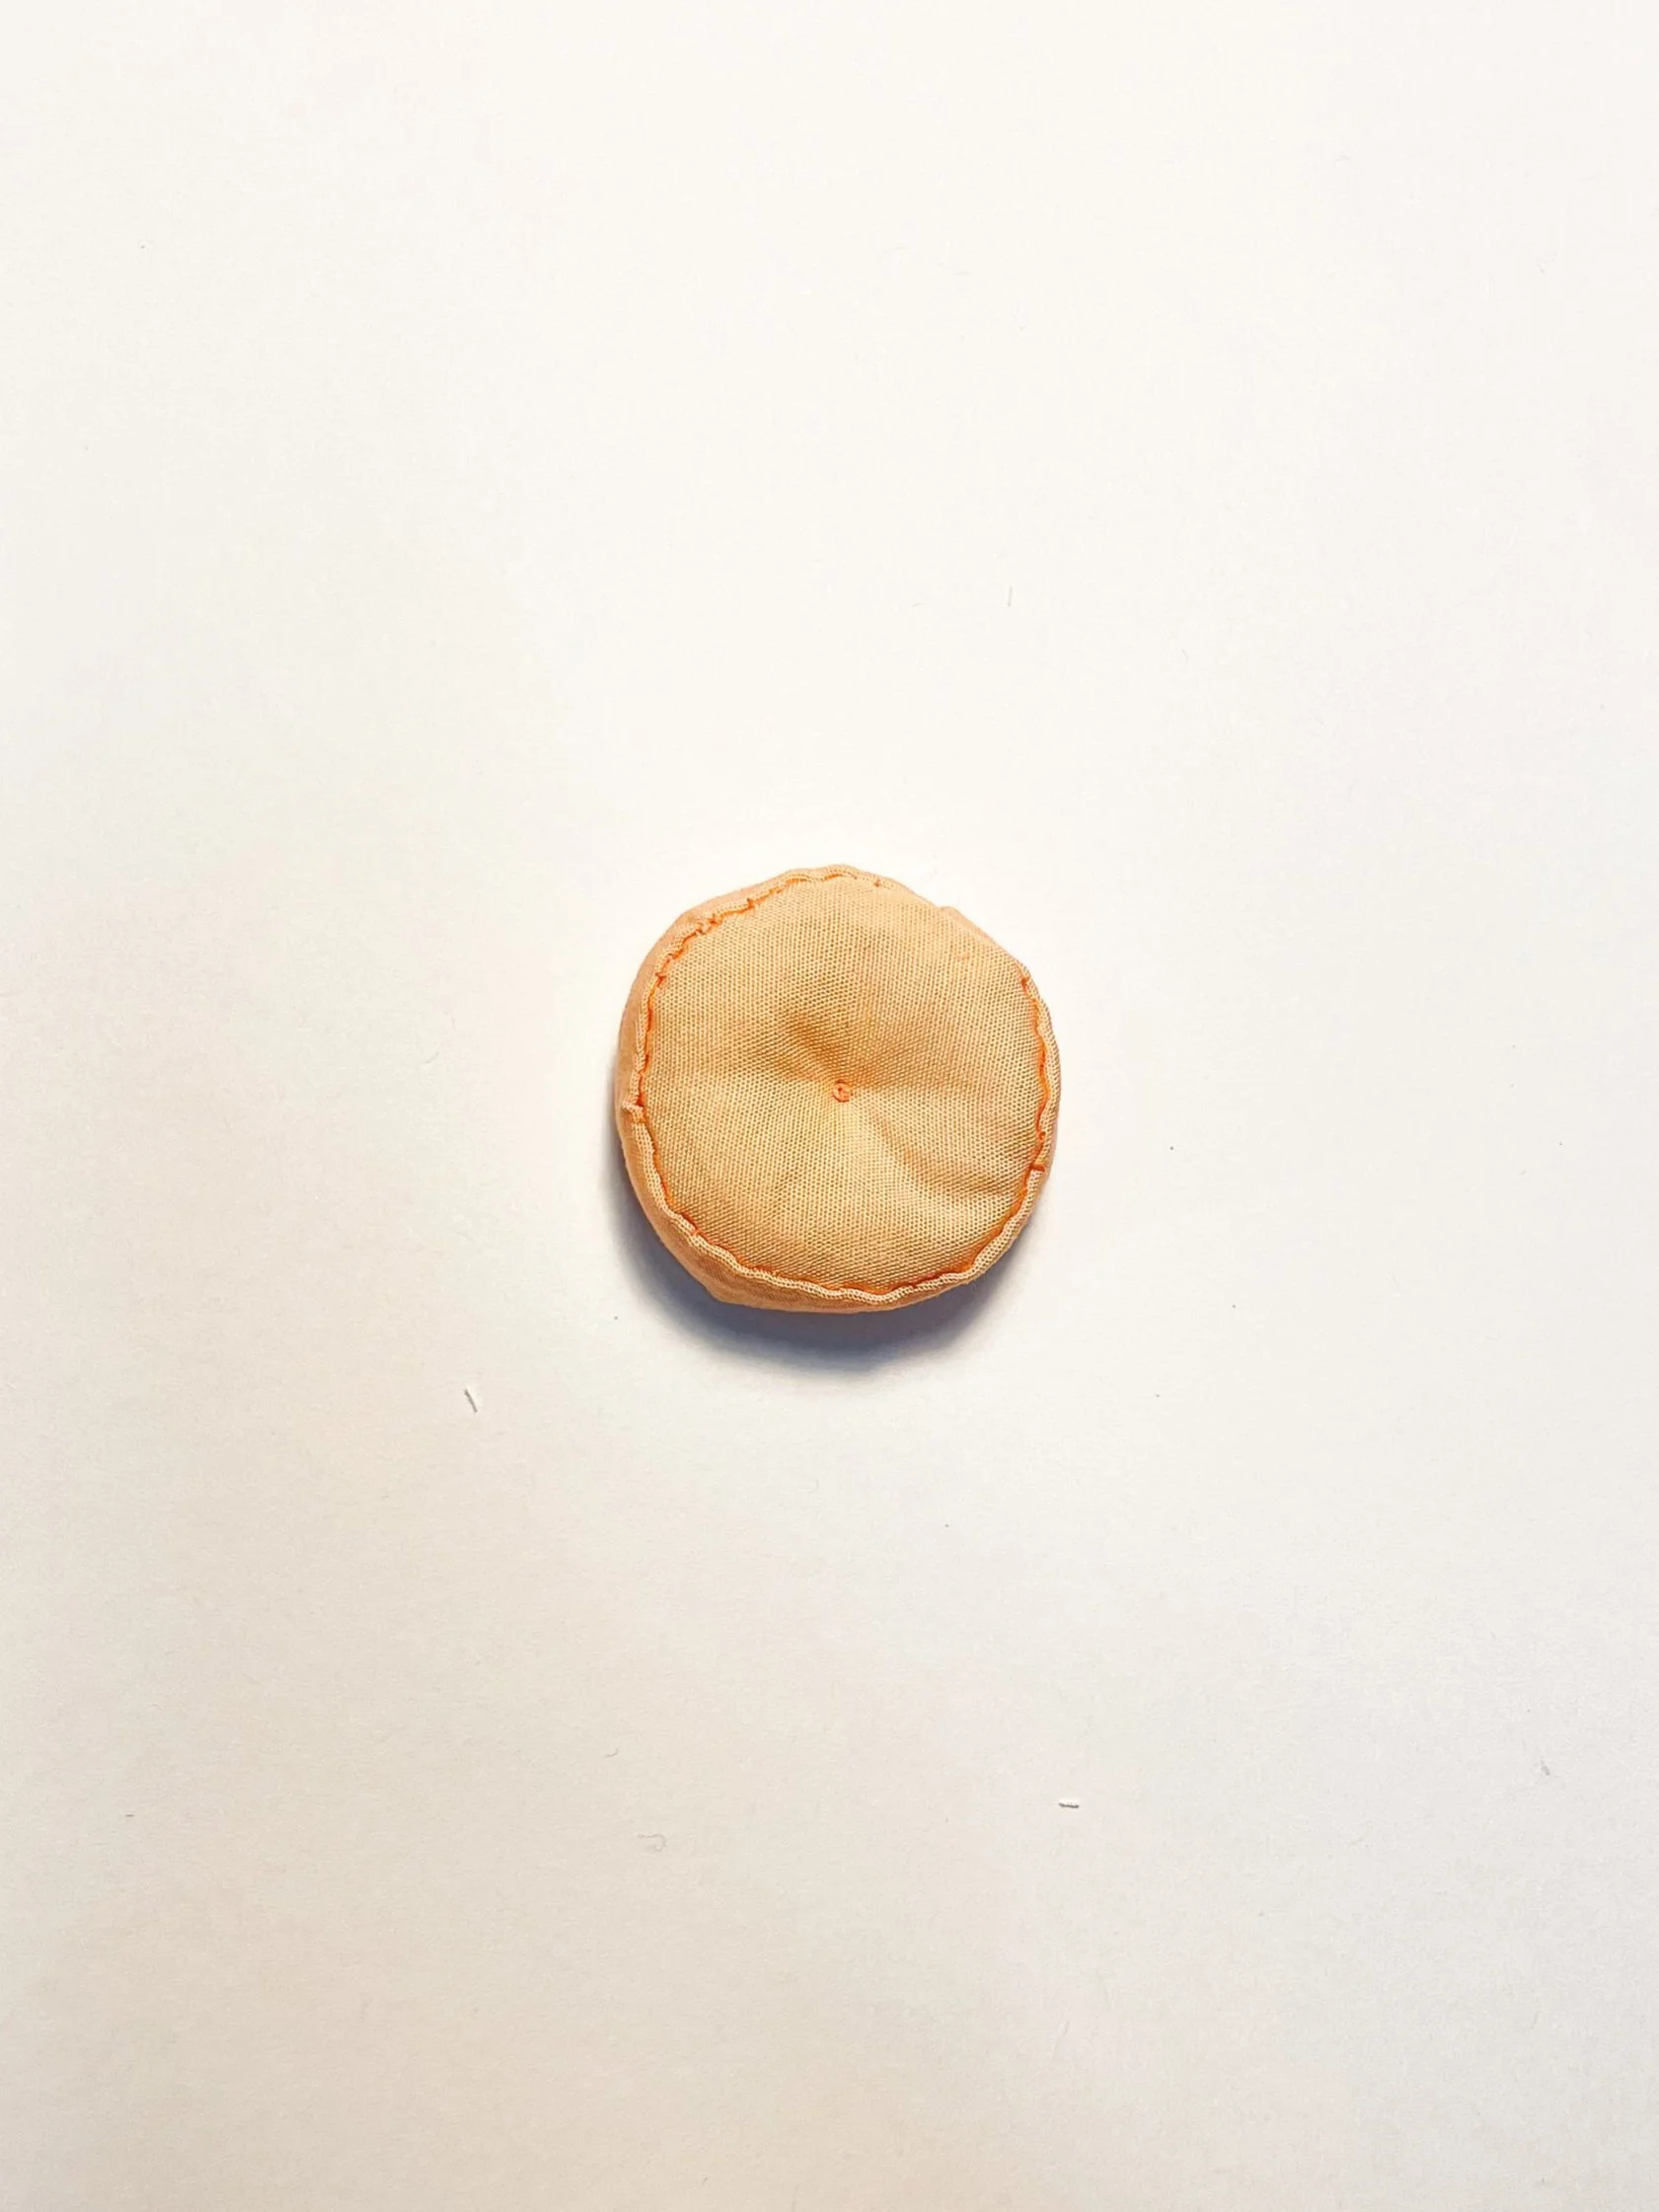
5. Stuff your pillows with poly-fil or other stuffing. I find it’s helpful to use a wood dowel of stick to push the stuffing inside. Really get it into the corners well and make sure everything feels evenly spread.
6. Using a blind stitch or a whip stitch, close the open seam on your pillow by hand-sewing.
7. Bonus step - add a french knot in the very center of a pillow to make a tufted look!


Square Pillow Sewing Video Guide
Short step by step process of sewing a square decorative pillow for dollhouse.
Round Pillows
Round pillows are a little bit more fiddly that the square ones, and I suggest hand-sewing it rather than on a machine.
Cut Out Materials & Sew
Cut out your pillows from your fabric. You’ll need two circles and one long skinny rectangle. The length of your rectangle will depending on the circumference of your circle. I cut my rectangle long just to be safe, and trimmed it later.
Before sewing, cut notches along the circle edges and rectangle edges. This will help the fabric curve easily as you sew. I drew my sewing line in pencil (see below), so I knew where to align the seams.
Place one circle and the rectangle right side together along one edge. Next, sew along the sides at about a 1/4” from the edge, curving the rectangle along the circle edge as you make you way around. When you get all the way around, mark where your rectangle overlaps itself and sew the ends of the rectangle together as well (you may need to trim excess length off here.)
Sew the other circle piece onto the opposite rectangle edge next. Still right sides together! Leave an opening unsewn here so you can turn the pillow right side out at the end. A gap about 3/4” wide should be enough to turn the pillow.

Stuff Pillows and Finish Open Seam
5. Turn your pillow right sides out by using the opening in the seam you made.
6. Stuff your pillow with poly-fil or other stuffing. I find it’s helpful to use a wood dowel of stick to push the stuffing inside. Really get it next to the seams well and make sure everything feels evenly spread.
7. Using a blind stitch or a whip stitch, close the open seam on your pillow by hand-sewing.
8. Bonus step - add a french knot in the very center of a pillow to make a tufted look!

Round Pillow Sewing Video Guide
Short step by step video on how to sew a round pillow for a dollhouse.

Decorative throw pillows can really make your dollhouse or diorama come to life! Experiment with different sizes and shapes as you fill out your interiors.