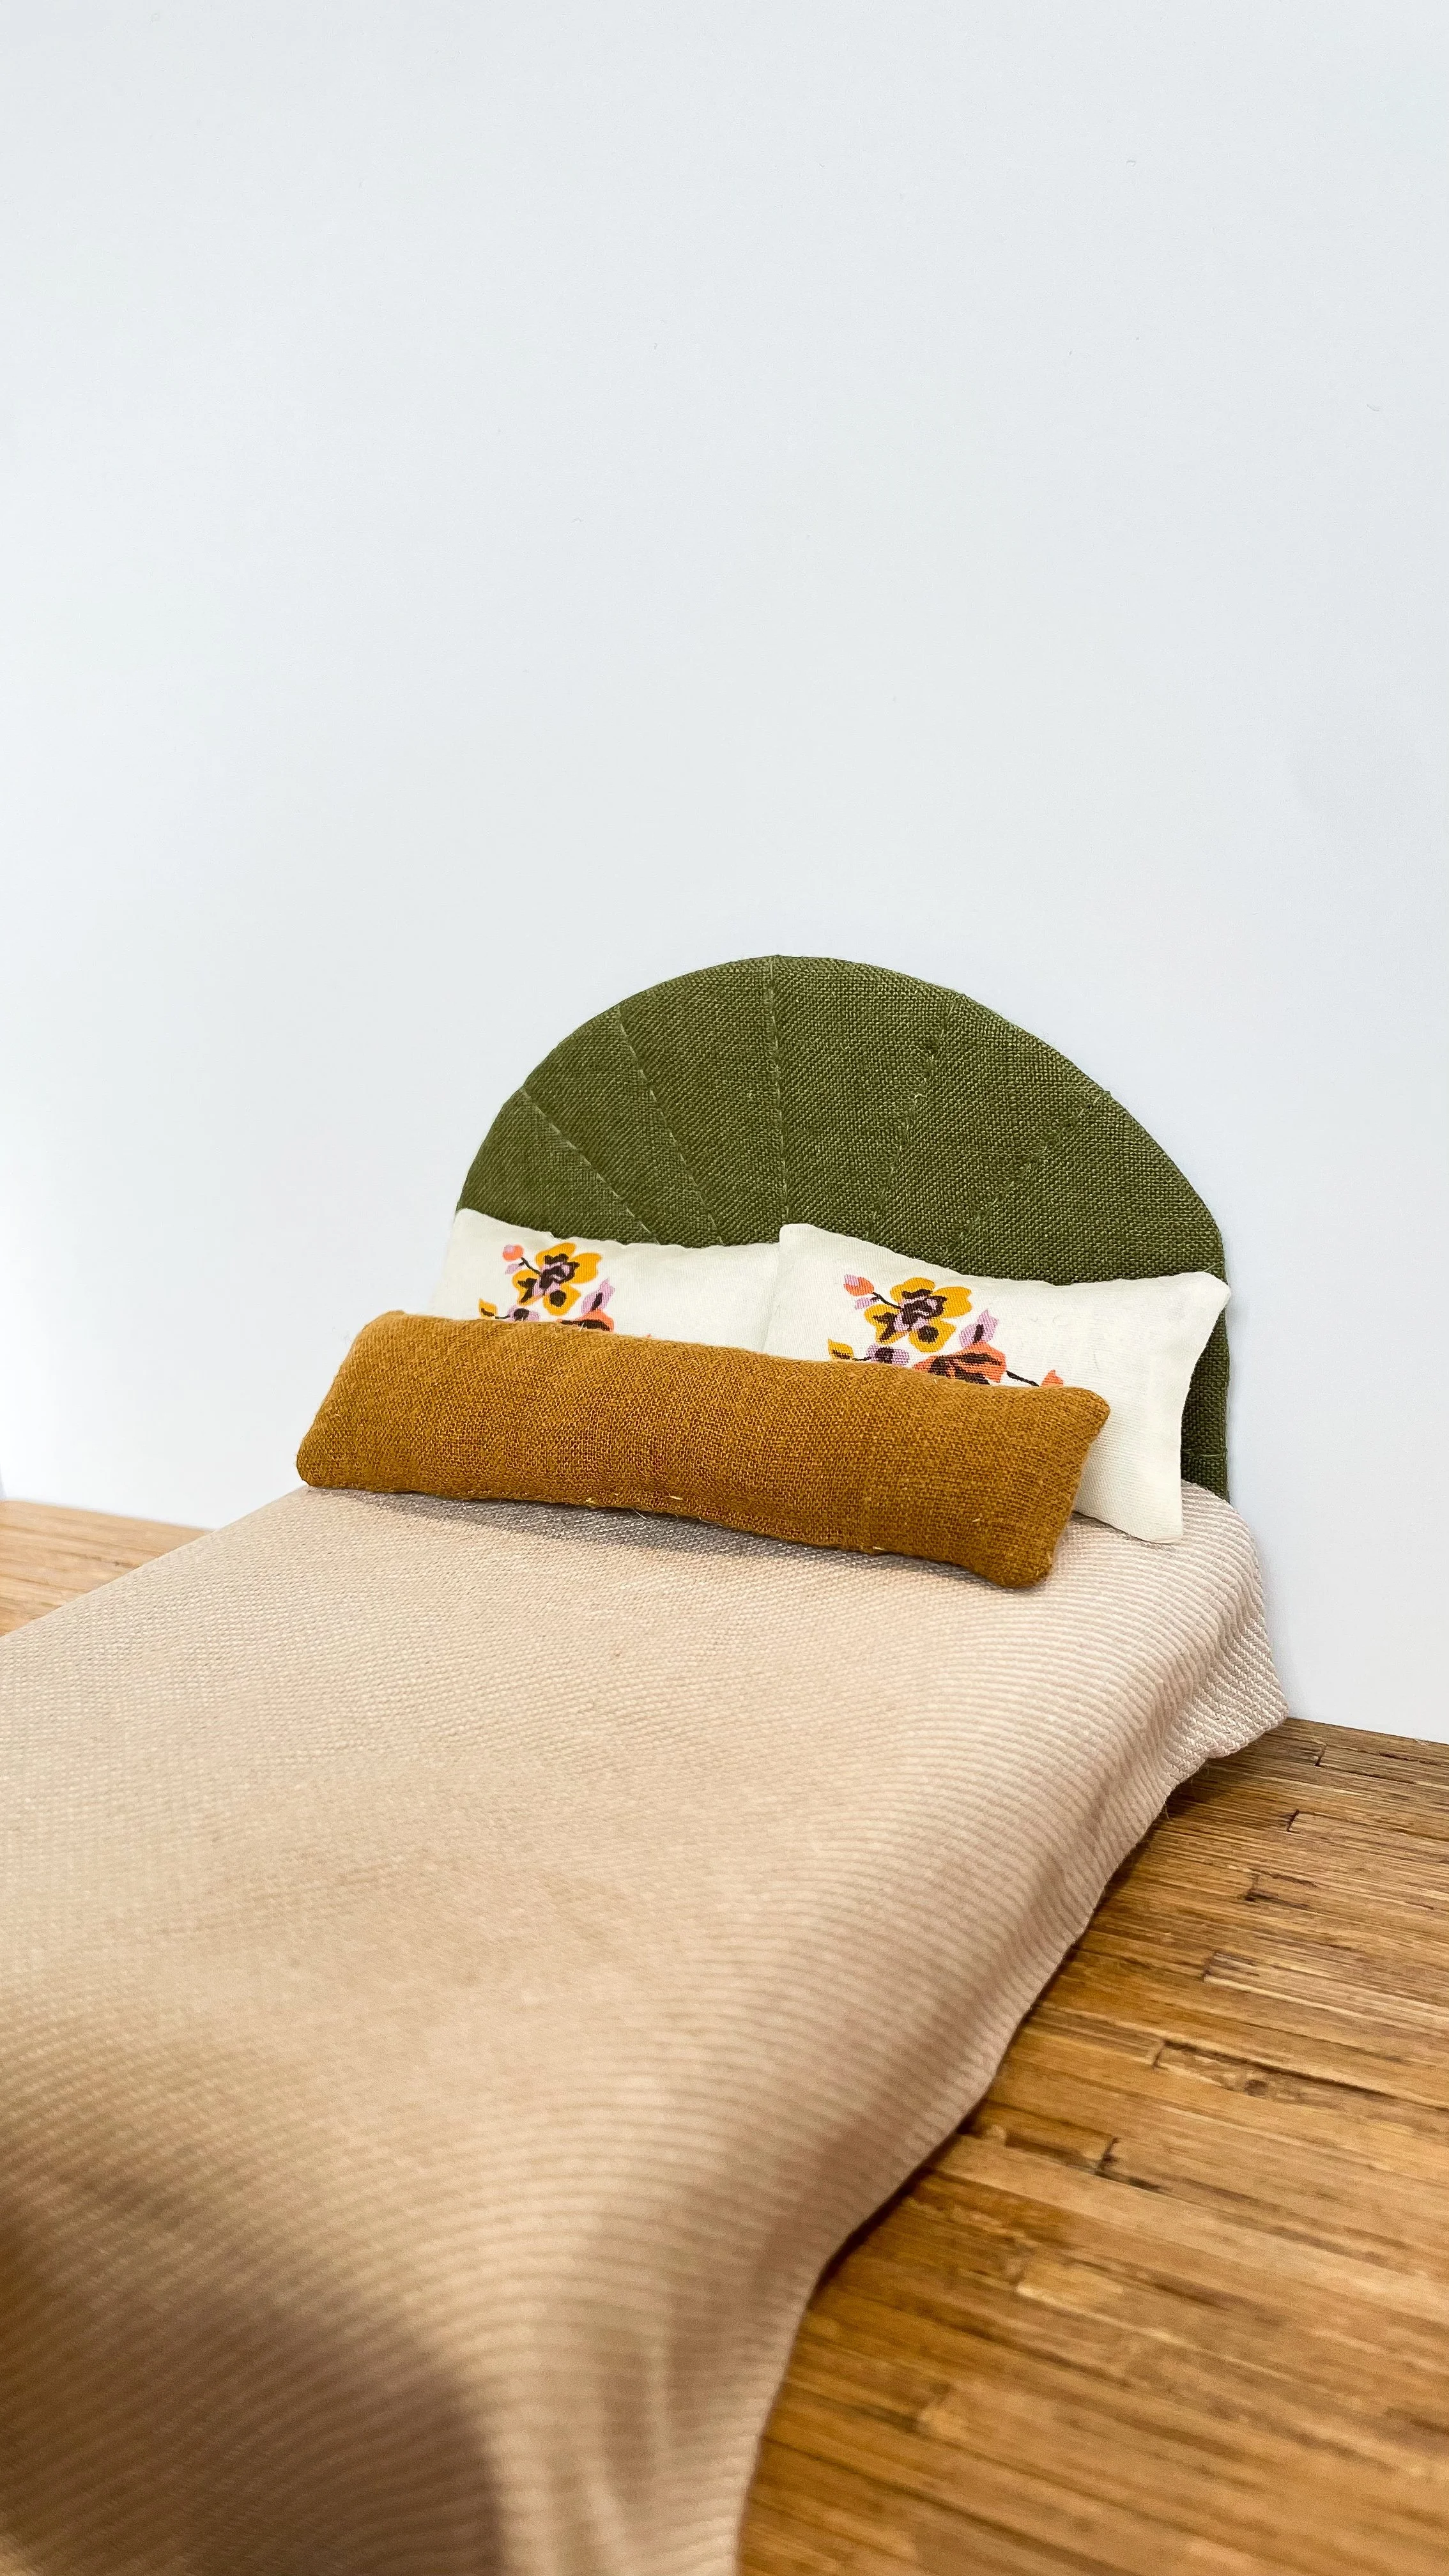
Dollhouse Bed DIY: Upholstered Headboard Options

I could not decide on a headboard style for this bed tutorial, so I included two options! The first headboard is a fabric-covered, half-moon headboard with stitching details, and the second style is a scooped headboard silhouette, with upholstery and trim details. Both of these designs are very beginner friendly, especially if this is your first time tackling upholstered dollhouse furniture. Both headboards can be made separately from the bed frame and then attached together at the end.
Materials
Mat board or chipboard
Foam Core poster board
Felt sheet (I used white)
Fabric of choice (perfect for scraps!)
Pearl Cotton Thread, Size 5 (sold individually at Michael’s, Hobby Lobby, etc in the embroidery section)
Glue (Fabric Glue, Tacky Glue, and/or Hot Glue)
X-acto Knife and scissors
Sewing machine with coordinating thread and heavy duty needle
Tailor’s chalk or disappearing fabric marker
Half-Moon Dollhouse Bed Tutorial

Prepare Your Materials
I first made this style of bed in a twin-sized for my Vermont Farmhouse Jr dollhouse. This tutorial will be for a full or queen sized bed that measures approximately 4.5” x 6” with the bed frame and headboard. Start by cutting the base shape of your headboard out of mat board. Cut the headboard backing out of a thinner material like cardstock. You can download the cutting templates below and trace them onto your pieces to get an exact match. Or, you can make your own shape and size by using a old-fashioned protractor.
Half Moon Cutting Template PDF Download
Fabric: Cut 2 squares approximately 6” x 5”
Felt: Cut 1 piece to fit the mat board front, trim as needed
Since this style mimics a cushioned upholstered bed, I first covered the mat board shape with felt. The felt does not need to extend past the edges. It can be cut exactly the size of the mat board. Glue the felt to the mat board.
Next, iron your fabric nice and smooth. Trace the radiating lines onto your fabric where the stitches will go with a fabric marker. I’ve included the template for the stitches in the same PDF download above. Or you can eye-ball it. ;) Place your fabric onto your mat board, with the felt sandwiched in-between. Do not glue the fabric to the felt yet, as it may shift a bit as you sew, causing ripples.


Sewing Instructions
Now you will sew the lines straight through the fabric, felt, and mat board. Be sure to use a heady duty sewing needing, but even my cheap machine did not run into any issues. It is important to start in the center where the lines meet and sew towards the edges - every time! Sew a line, clip your threads, then reposition the needle back at the center point to sew the next line. I found this way kept the fabric from rippling. And any shifting that might happen just pushes the fabric off the mat board, instead of creating a ripple in the middle. You can also sew a few stitches off the mat board as you finish a line (just keep going for about 1 inch) so that you have some extra fabric around the edges to fold back later.
After all the lines are sewn, you can use a needle to grab any loose threads on the right side center point, and push them through to the back side of the headboard. Clip the threads shorter but tape them down on the back. Trim the fabric edges around the headboard so there is about 1” of extra fabric on all sides.


Finish the Edges
Using hot glue or tacky glue, fold the edge of the fabric around to the back of the headboard. Slowly work your way around the outer curve to keep the fabric as flat as possible. You will need to glue in multiple places. Do the same around the sides, corners, and bottom.
The back of the headboard uses a simple piece of cardstock, cut slightly smaller than the front, and covered in fabric. This piece simply serves to cover the raw edges of the fabric. No need to add felt or stitching to the back piece. Cut it out from cardstock and wrap your fabric around this as well, gluing the raw edges to wrap around the paper.
Glue the back cardstock piece to the mat board piece, with the finished sides facing outwards.


Scooped Dollhouse Bed Tutorial - No Sew

Prepare Your Materials
This second style of headboard is a little more classic than the first. I used a cute art deco fabric and trimmed the edges in white thread. This tutorial doesn’t require any sewing - glue only! This tutorial will be for a full or queen sized bed that measures approximately 4.5” x 6” with the bed frame and headboard. Start by cutting the base shape of your headboard out of foam core. Cut the headboard backing out of a thin material like cardstock. You can download the cutting templates below and trace them onto your pieces to get an exact match.
Scooped Cutting Template PDF Download
Fabric: Cut 2 squares approximately 7” x 6”
Felt: Cut 1 piece 5.5” x 5” (this will be folded over the foam core)
Wrap the Fabric Around the Headboard
Since this style mimics a cushioned upholstered bed, I first covered the foam core with felt, gluing it to the front. The felt will need to wrap around the foam core edges. Try to do this neatly, without too many overlapping edges. Work your way around the curves by cutting slits in the felt. Glue the wrapped pieces of felt down to the back side of the foam core.
Next, iron your fabric nice and smooth. Place your fabric onto your foam core, with the felt sandwiched in-between. You can lightly glue the fabric to the felt in a couple of places using fabric glue. This will help it stay in place on the front while you wrap and stretch the fabric around to the back. Wrapping the fabric is probably the hardest part because of the curves. I started at the top of the headboard, then did the corner curves. You can cut slits in the fabric again (like the felt), but don’t cut these quite as deep.


Finish the Edges
The back of the headboard uses a simple piece of cardstock, cut slightly smaller than the front, and covered in fabric. This piece simply serves to cover the raw edges of the fabric. No need to add felt to the back piece. Cut it out from cardstock and wrap your fabric around this as well, gluing the raw edges to wrap around the paper.
Glue the back cardstock piece to the foam core piece, with the finished sides facing outwards.


Trim with Thread
The embroidery thread adds just a little more detail and is a quick final step. You will need embroidery thread that is a little thicker. I used Pearl Cotton, Size 5 thread in white by DMC. Put a glob of Tacky Glue on a scrap of paper. Using a toothpick, dip the end of the toothpick into the glue, and then trace a line of glue around the edges of the headboard front. I did a line of glue about 1/4” from the outside edge, and then another line right on the top edge. Using your fingers, place the thread along your glue line. Press it down as you go, but by only using a little glue, it sticks pretty well and does not budge. Mine dried pretty fast.


Attach to a Bedframe
Once you have completed your headboards, you can glue them to any basic bed frame. Read my next tutorial on how I made my simple bed frame out of basswood strips!
In the meantime, tag me in any of your re-creations on social media!