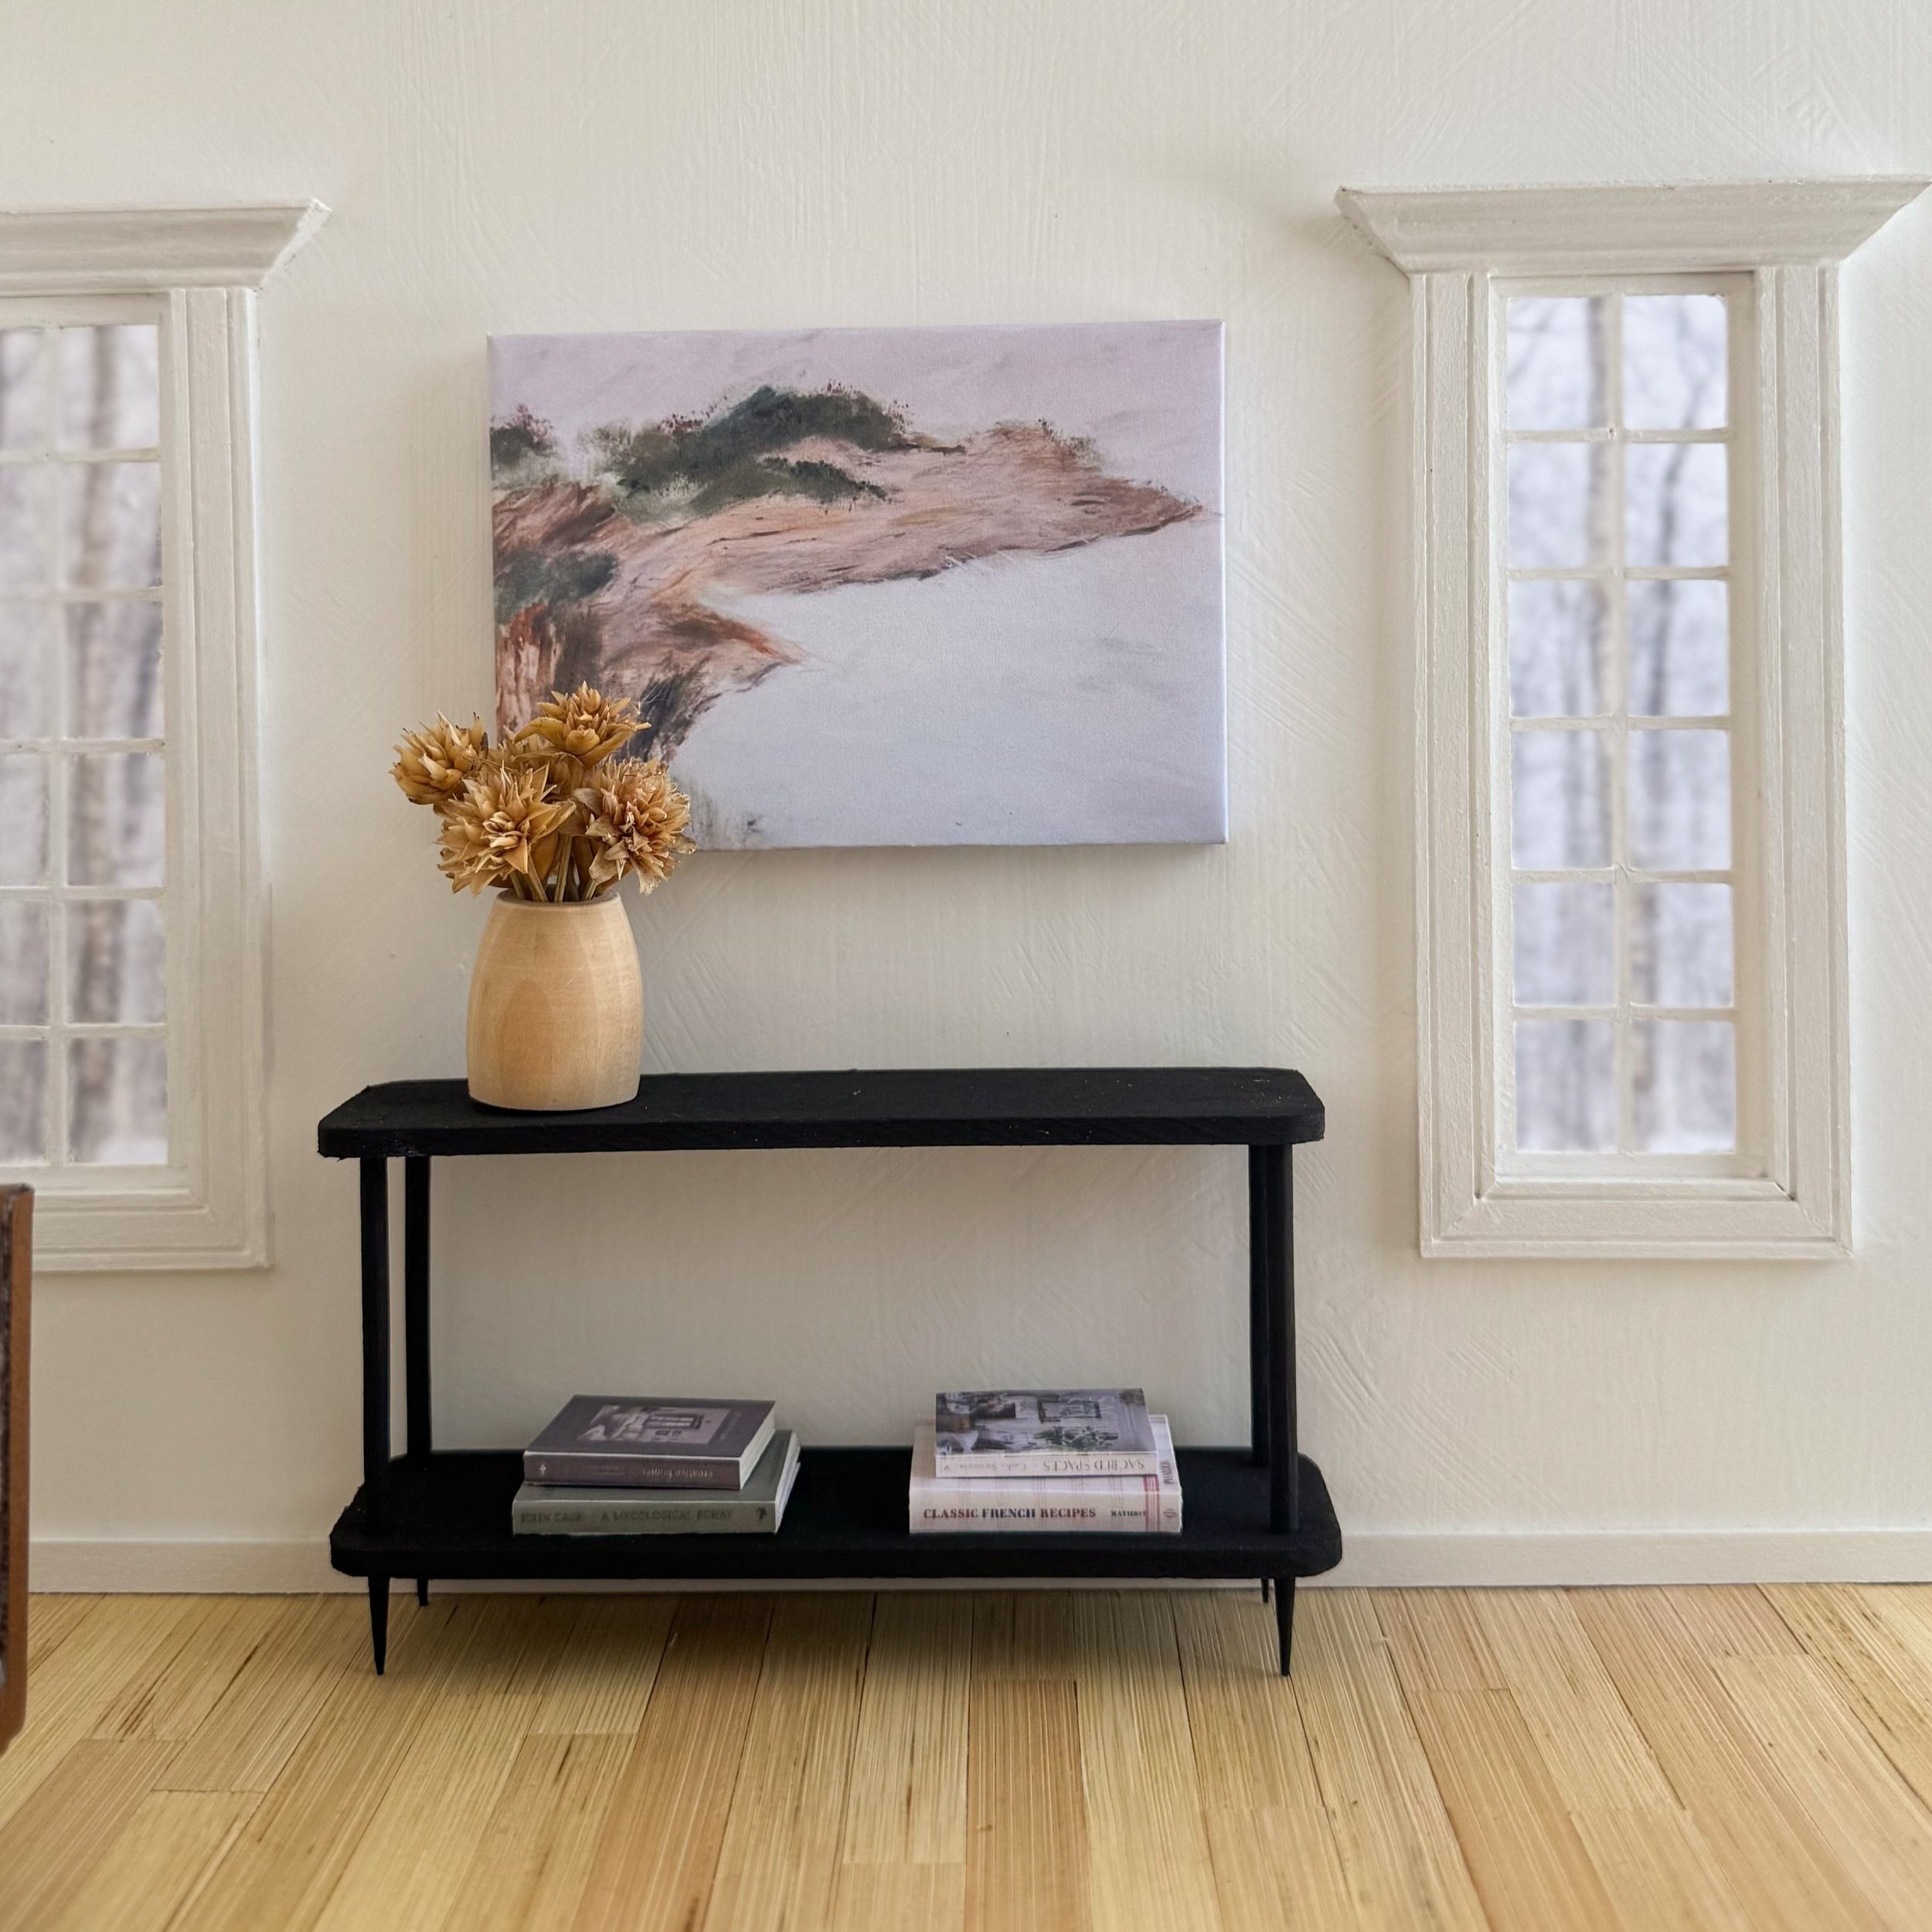
Dollhouse DIY Modern Console Table
This dollhouse DIY tutorial is so simple and very beginner friendly! With just a couple of basic tools, you can create a living room or entry way console with two shelves and taped legs. I grabbed some spare basswood scraps I had laying around and wooden skewers from my kitchen. About an hour later, I had created this little table. Follow the steps below to make your own!

Materials
4 wooden skewers (about 1/8” diameter, like an hors d'oeuvres size)
Paint or wood stain
Sandpaper
Electric drill or pin vice
Sharp box cutter or small hand saw
Masking or painter’s tape
Mini Console Table Tutorial
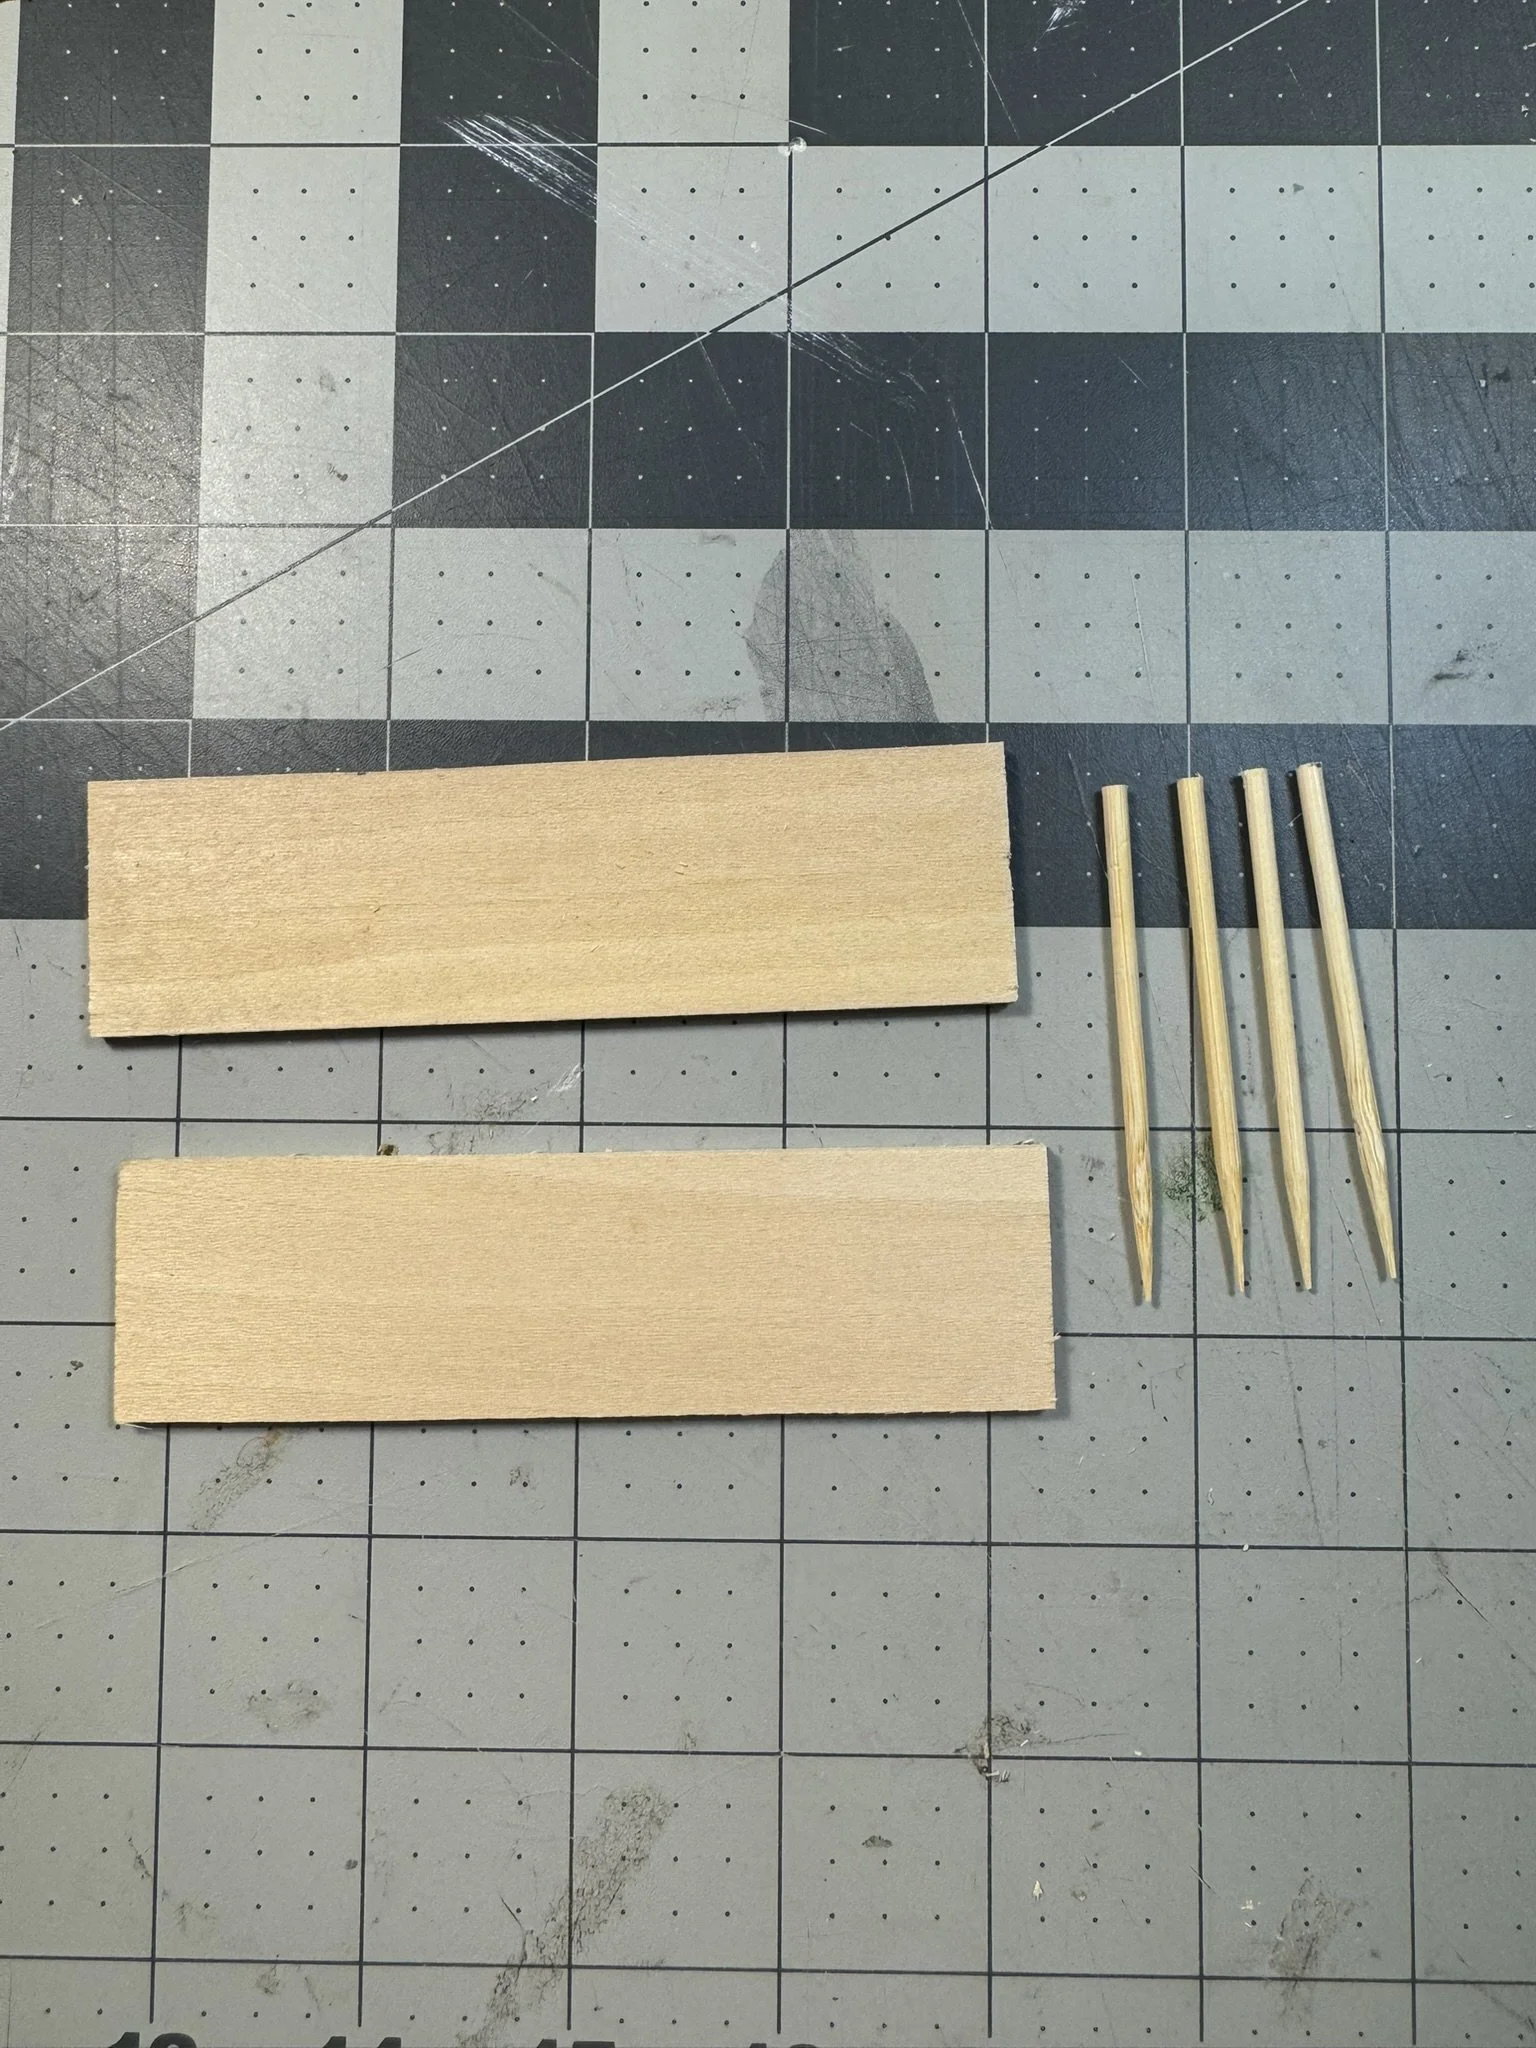
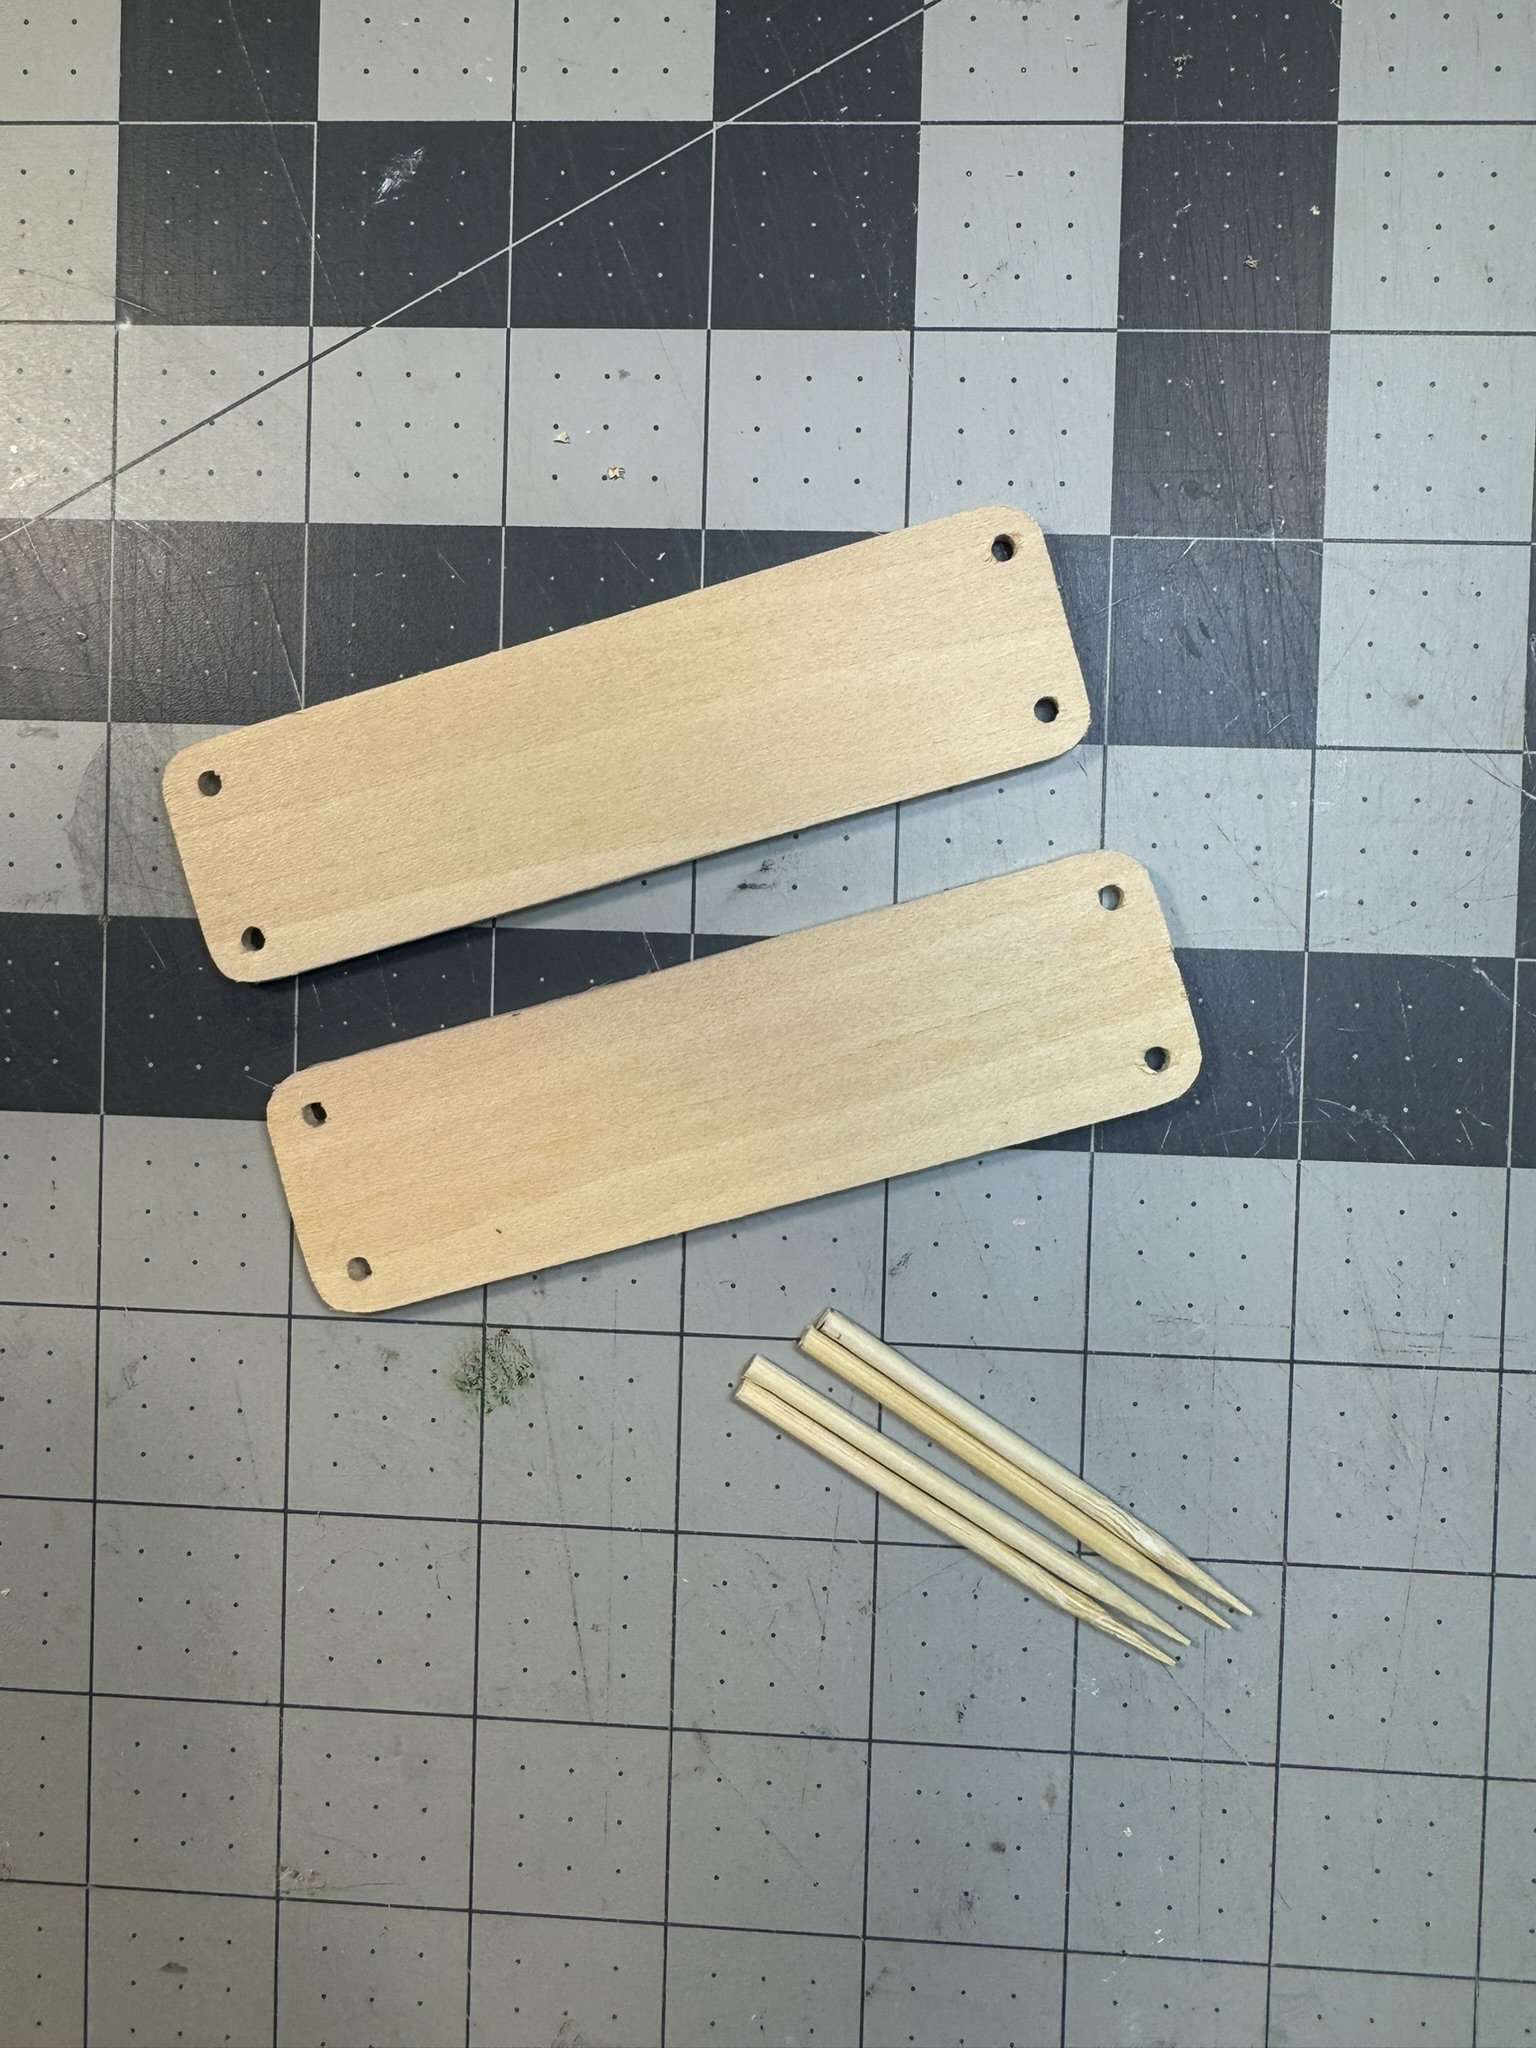
Start by cutting out your wood pieces using the sizes below. The basswood is thin enough that you can use a box cutter or Xacto knife if you are cutting along the wood grain. For cuts perpendicular to the grain, a hand saw is much quicker, but with enough strength, you can cut it all with a box cutter blade.
Cut List:
4.5” x 1.25” of basswood sheet - cut 2
2.5” long skewers, including the pointy end - cut 4
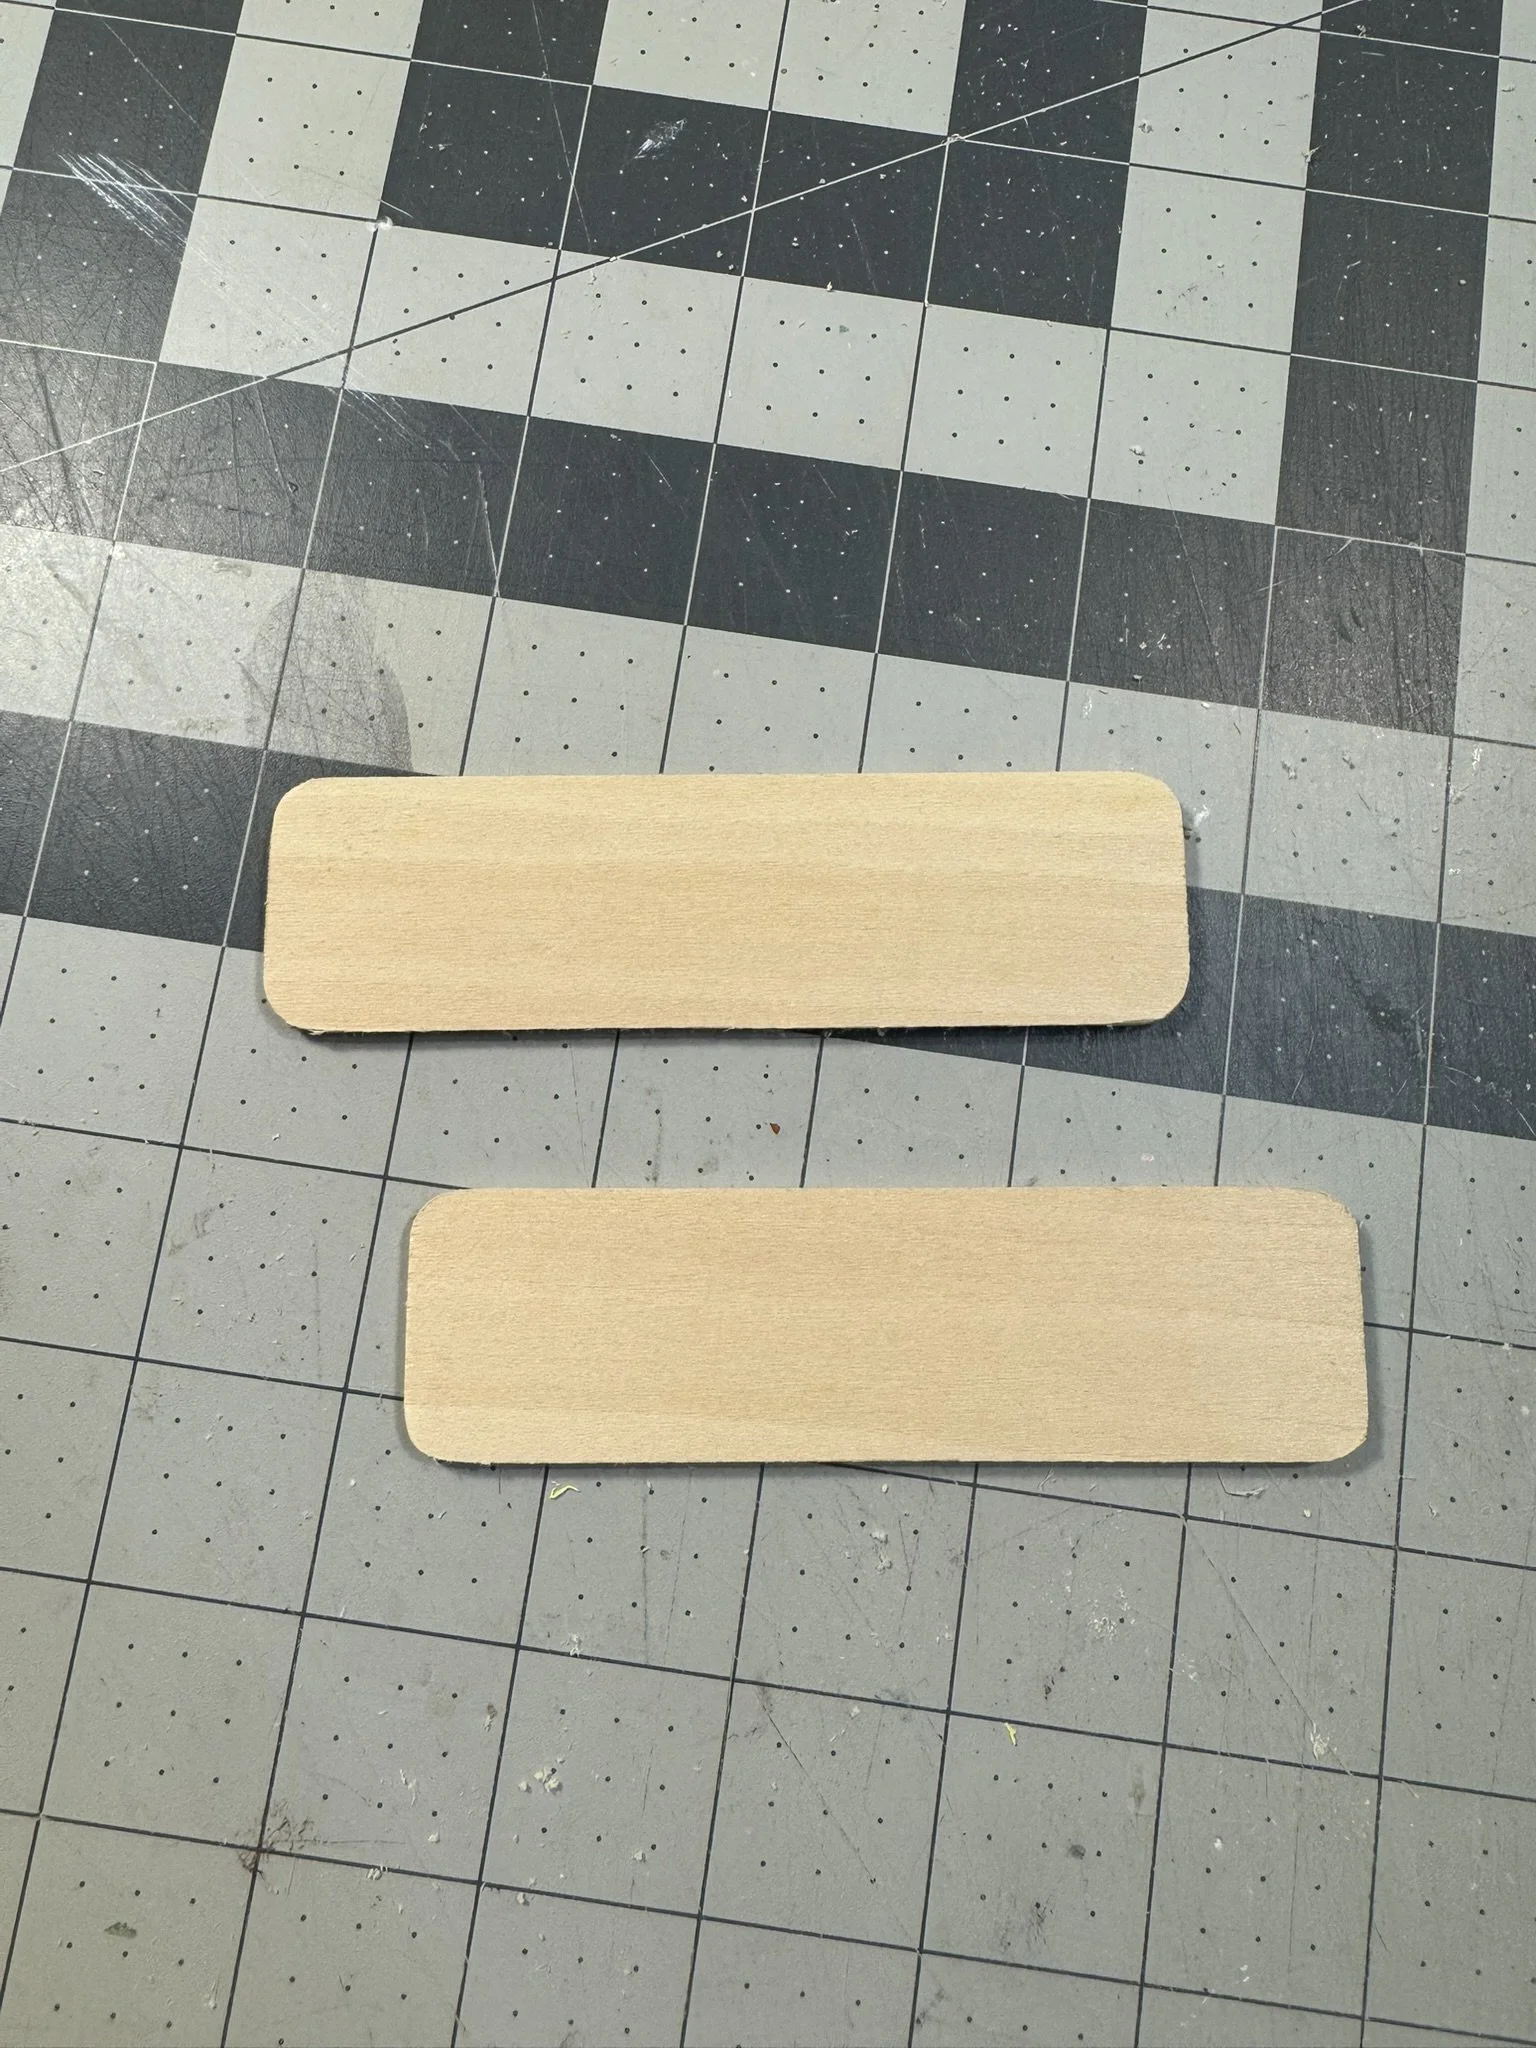
You should have two rectangles of matching sizes and 4 table legs. I chose to round the corners of my table shelves by simply sanding down the corners a bit until i had a nice rounded edge. This is optional!
Tape your two shelves together and mark where the table legs will go. For this style of table, the legs will be inserted through both shelves, so you want the holes to be perfectly lined up top to bottom. The tape helps with this. I marked my holes by tracing the flat end of the skewer about 1/8” away from each corner.
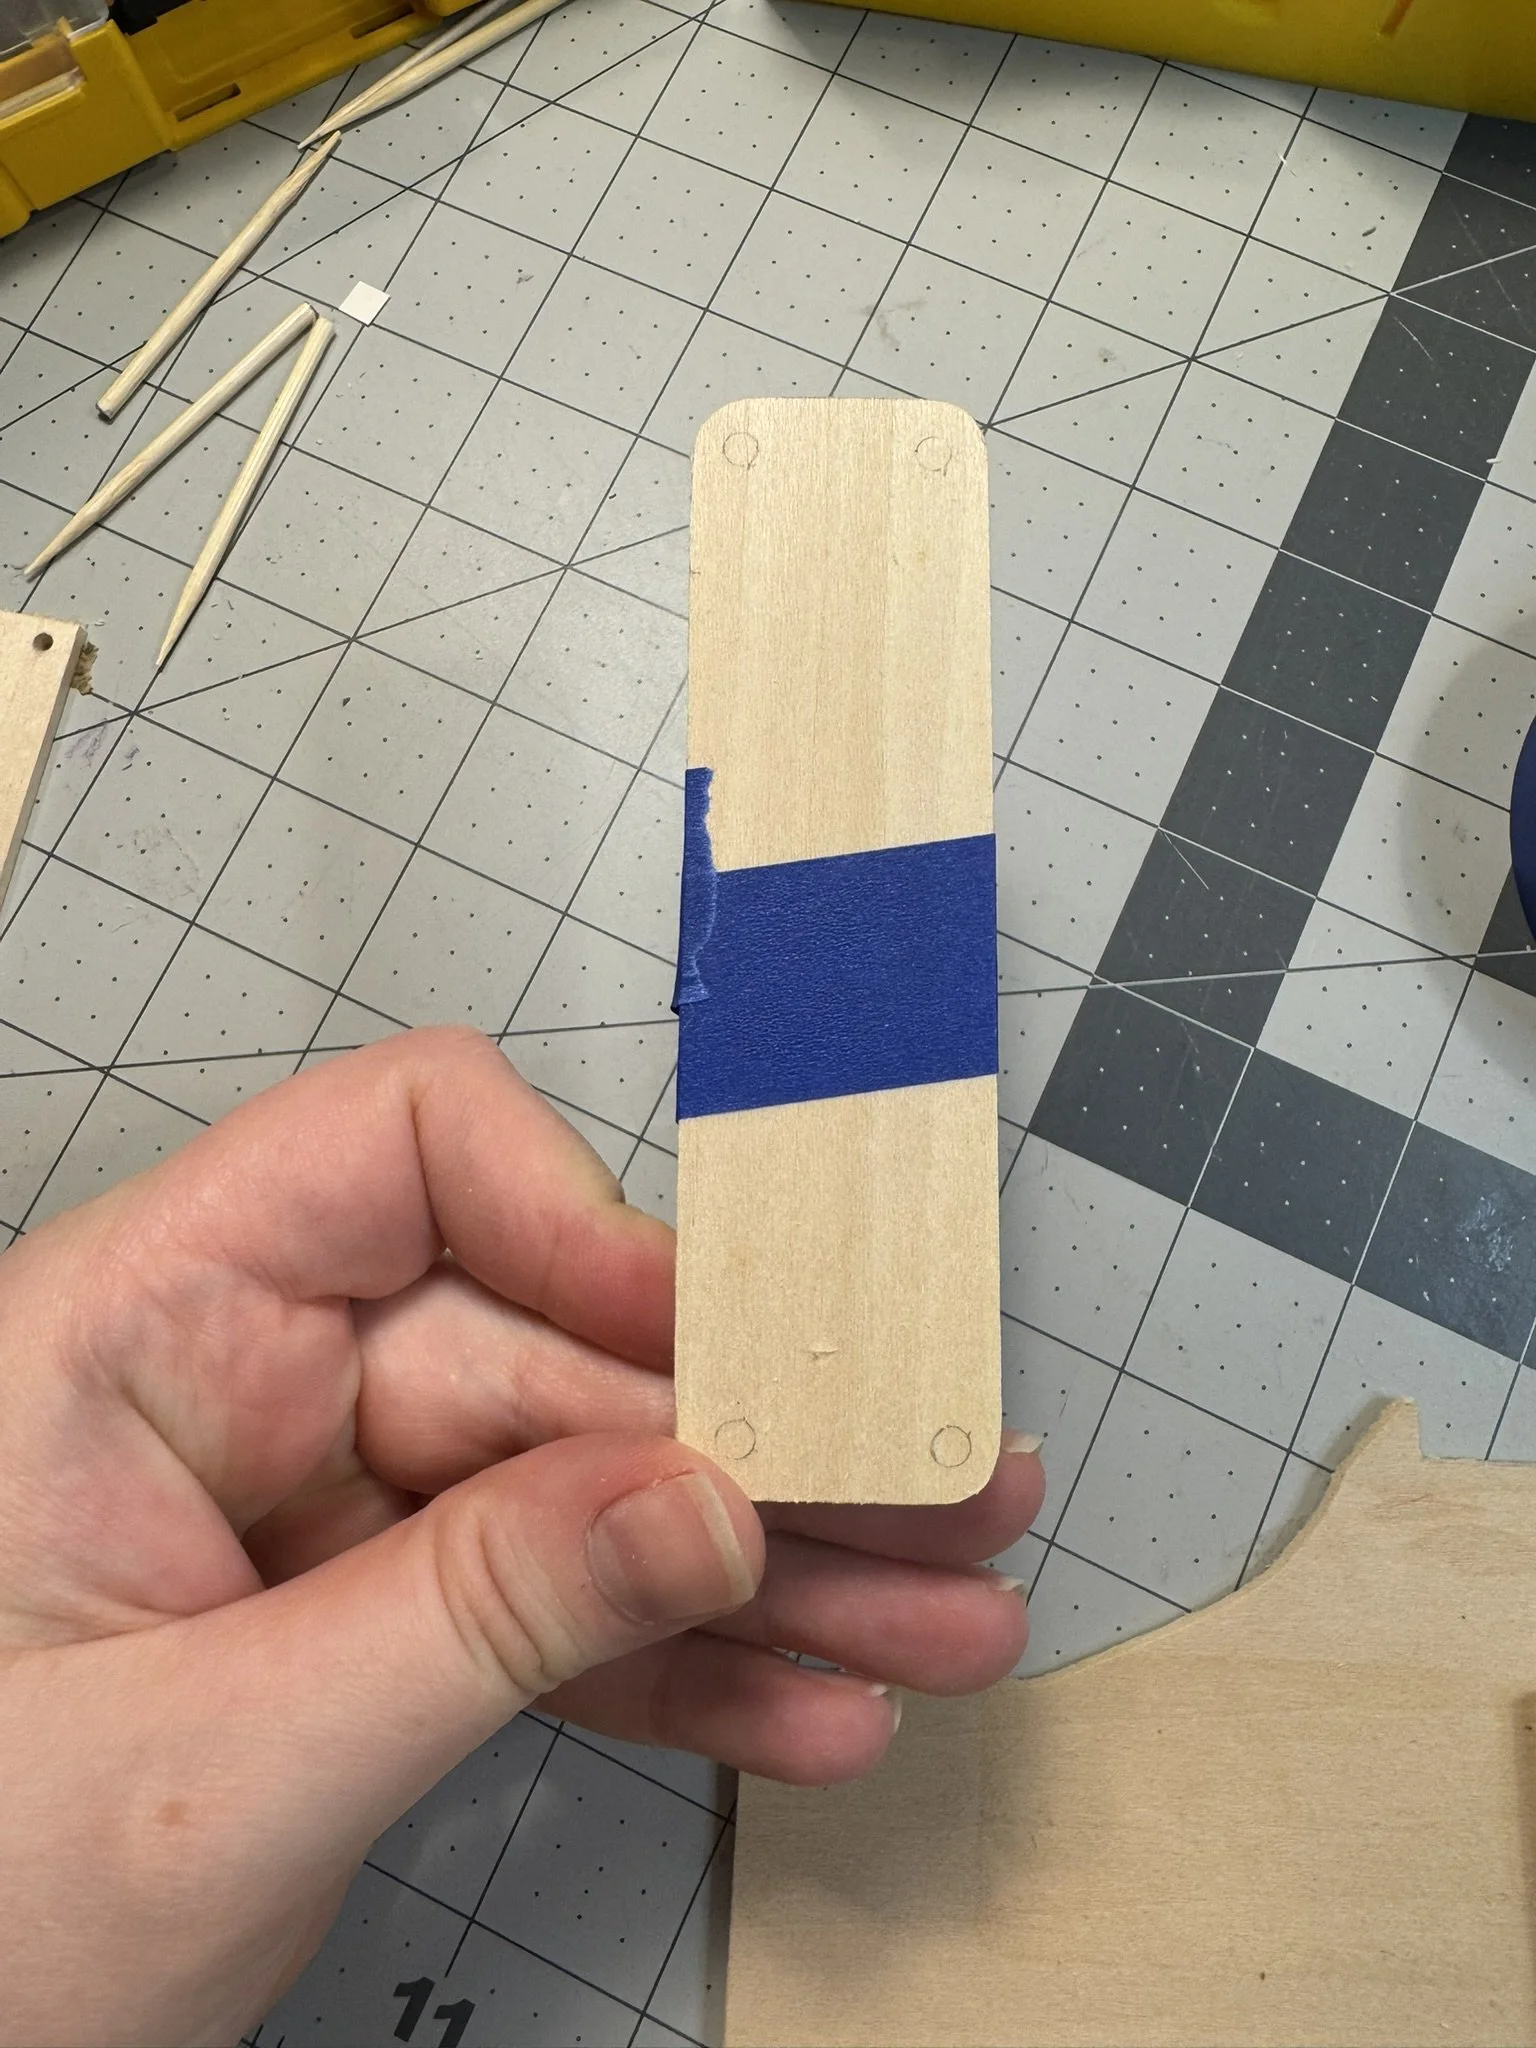
Next, tape your shelves (that are taped to each other) onto another spare block of wood. This gives you something to drill down into and some steadiness as you drill. Use a drill bit that matches the diameter of your skewers. In my case, I used a 1/8” bit. GO SLOW and be sure to drill straight down into the space block of wood. Repeat until you have 4 holes total.
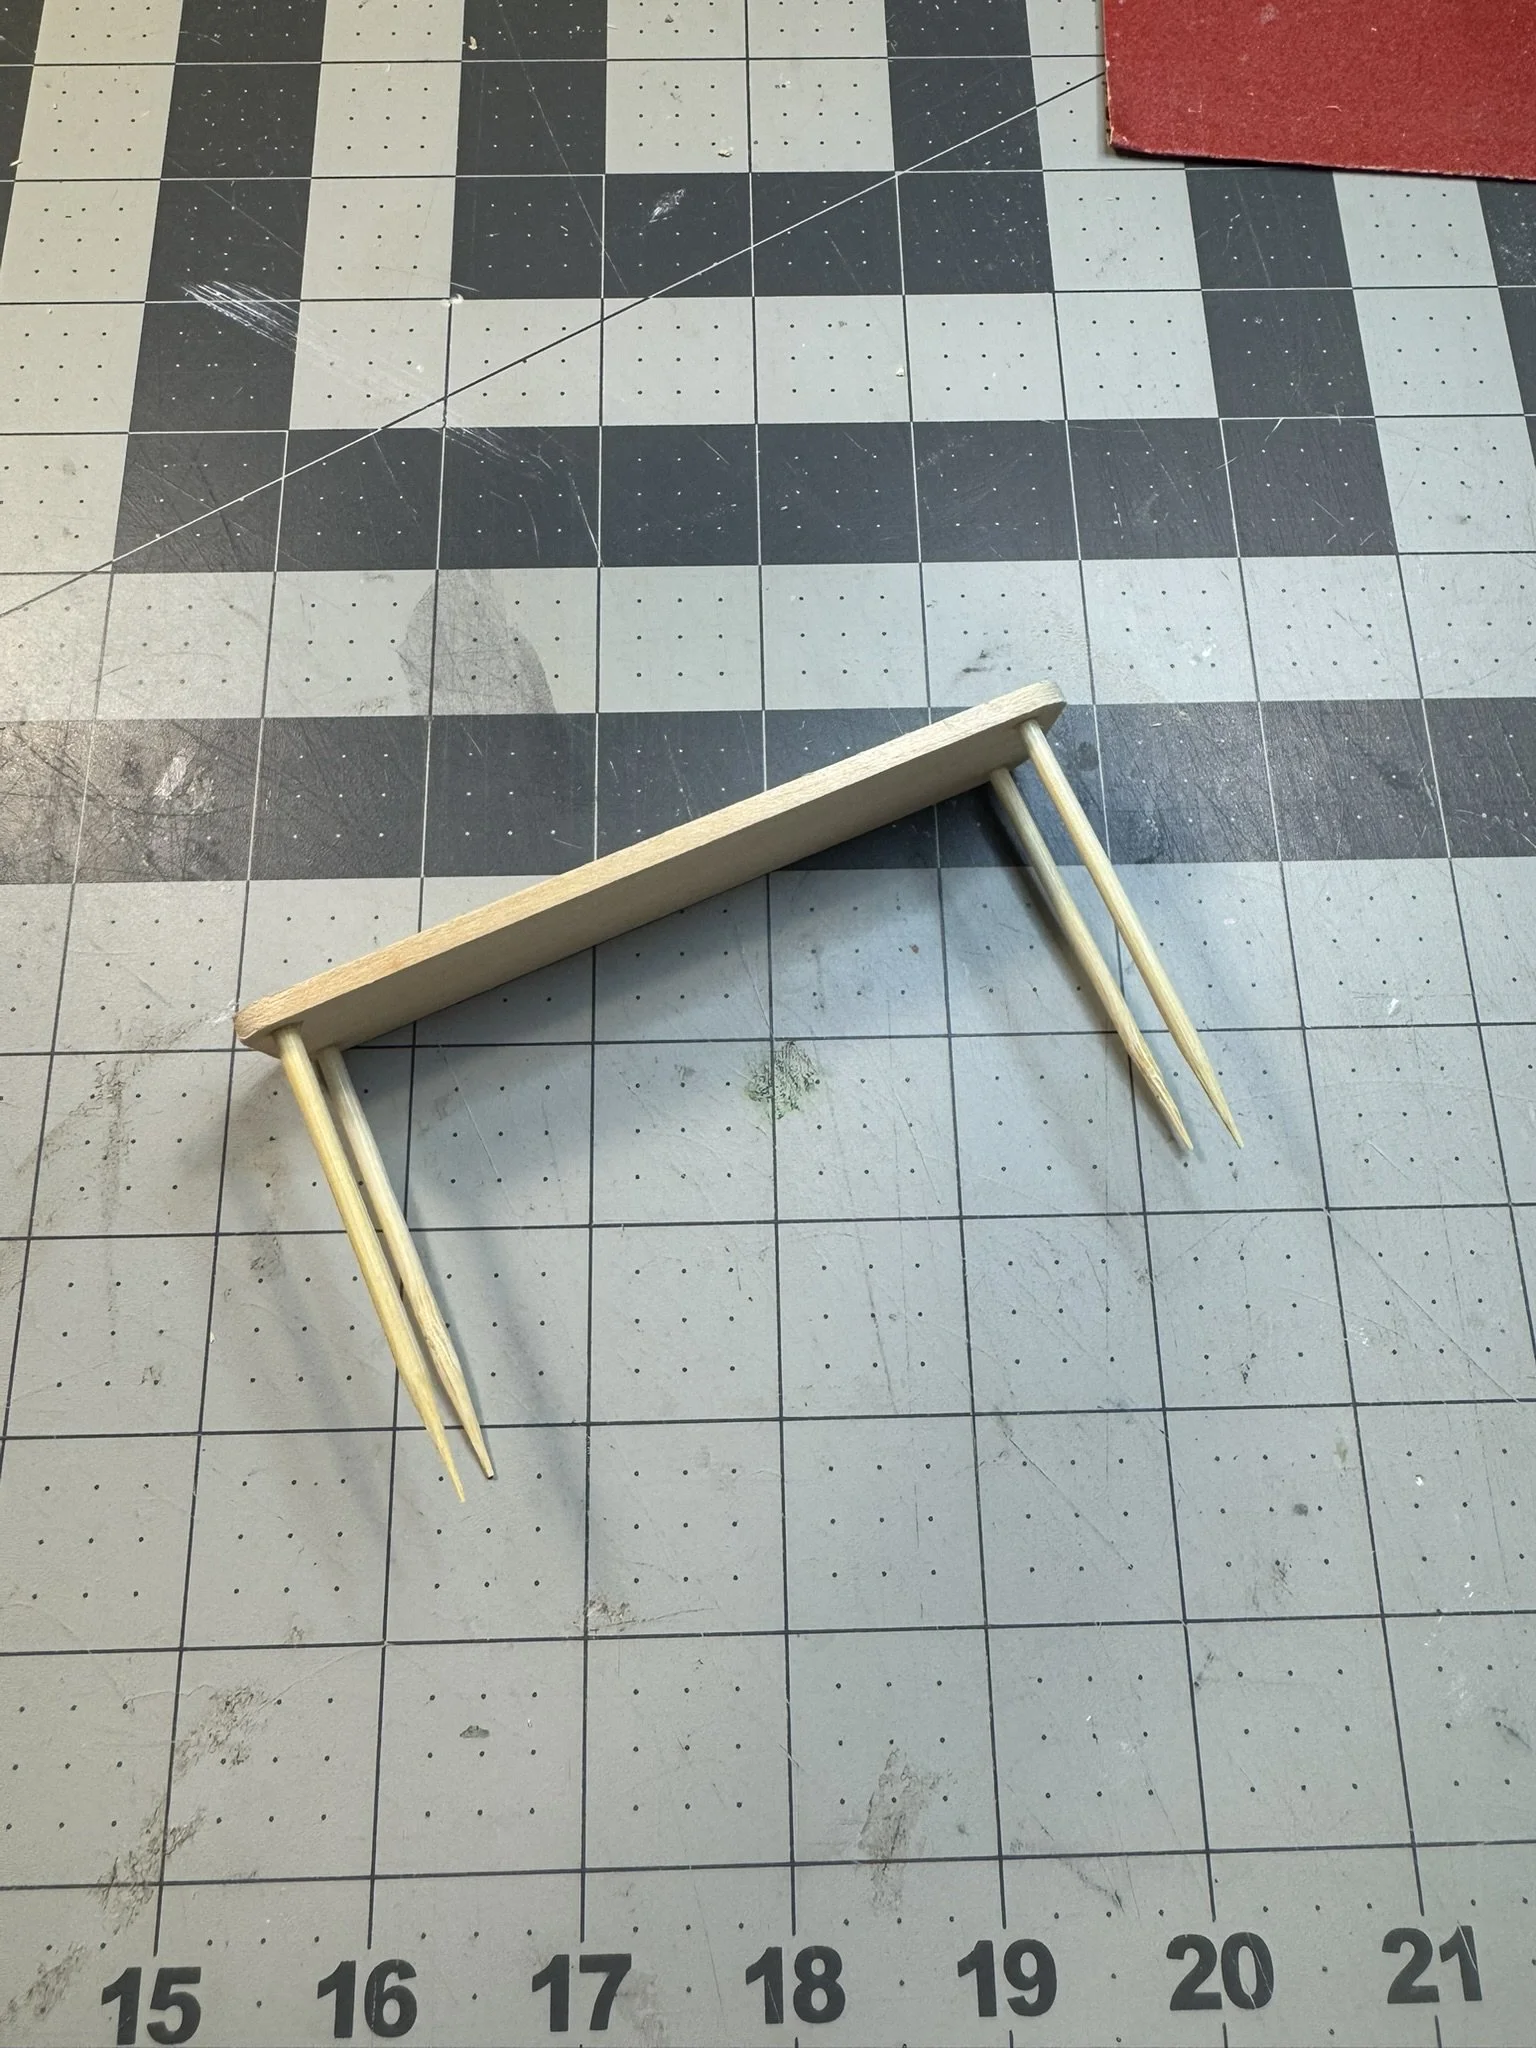
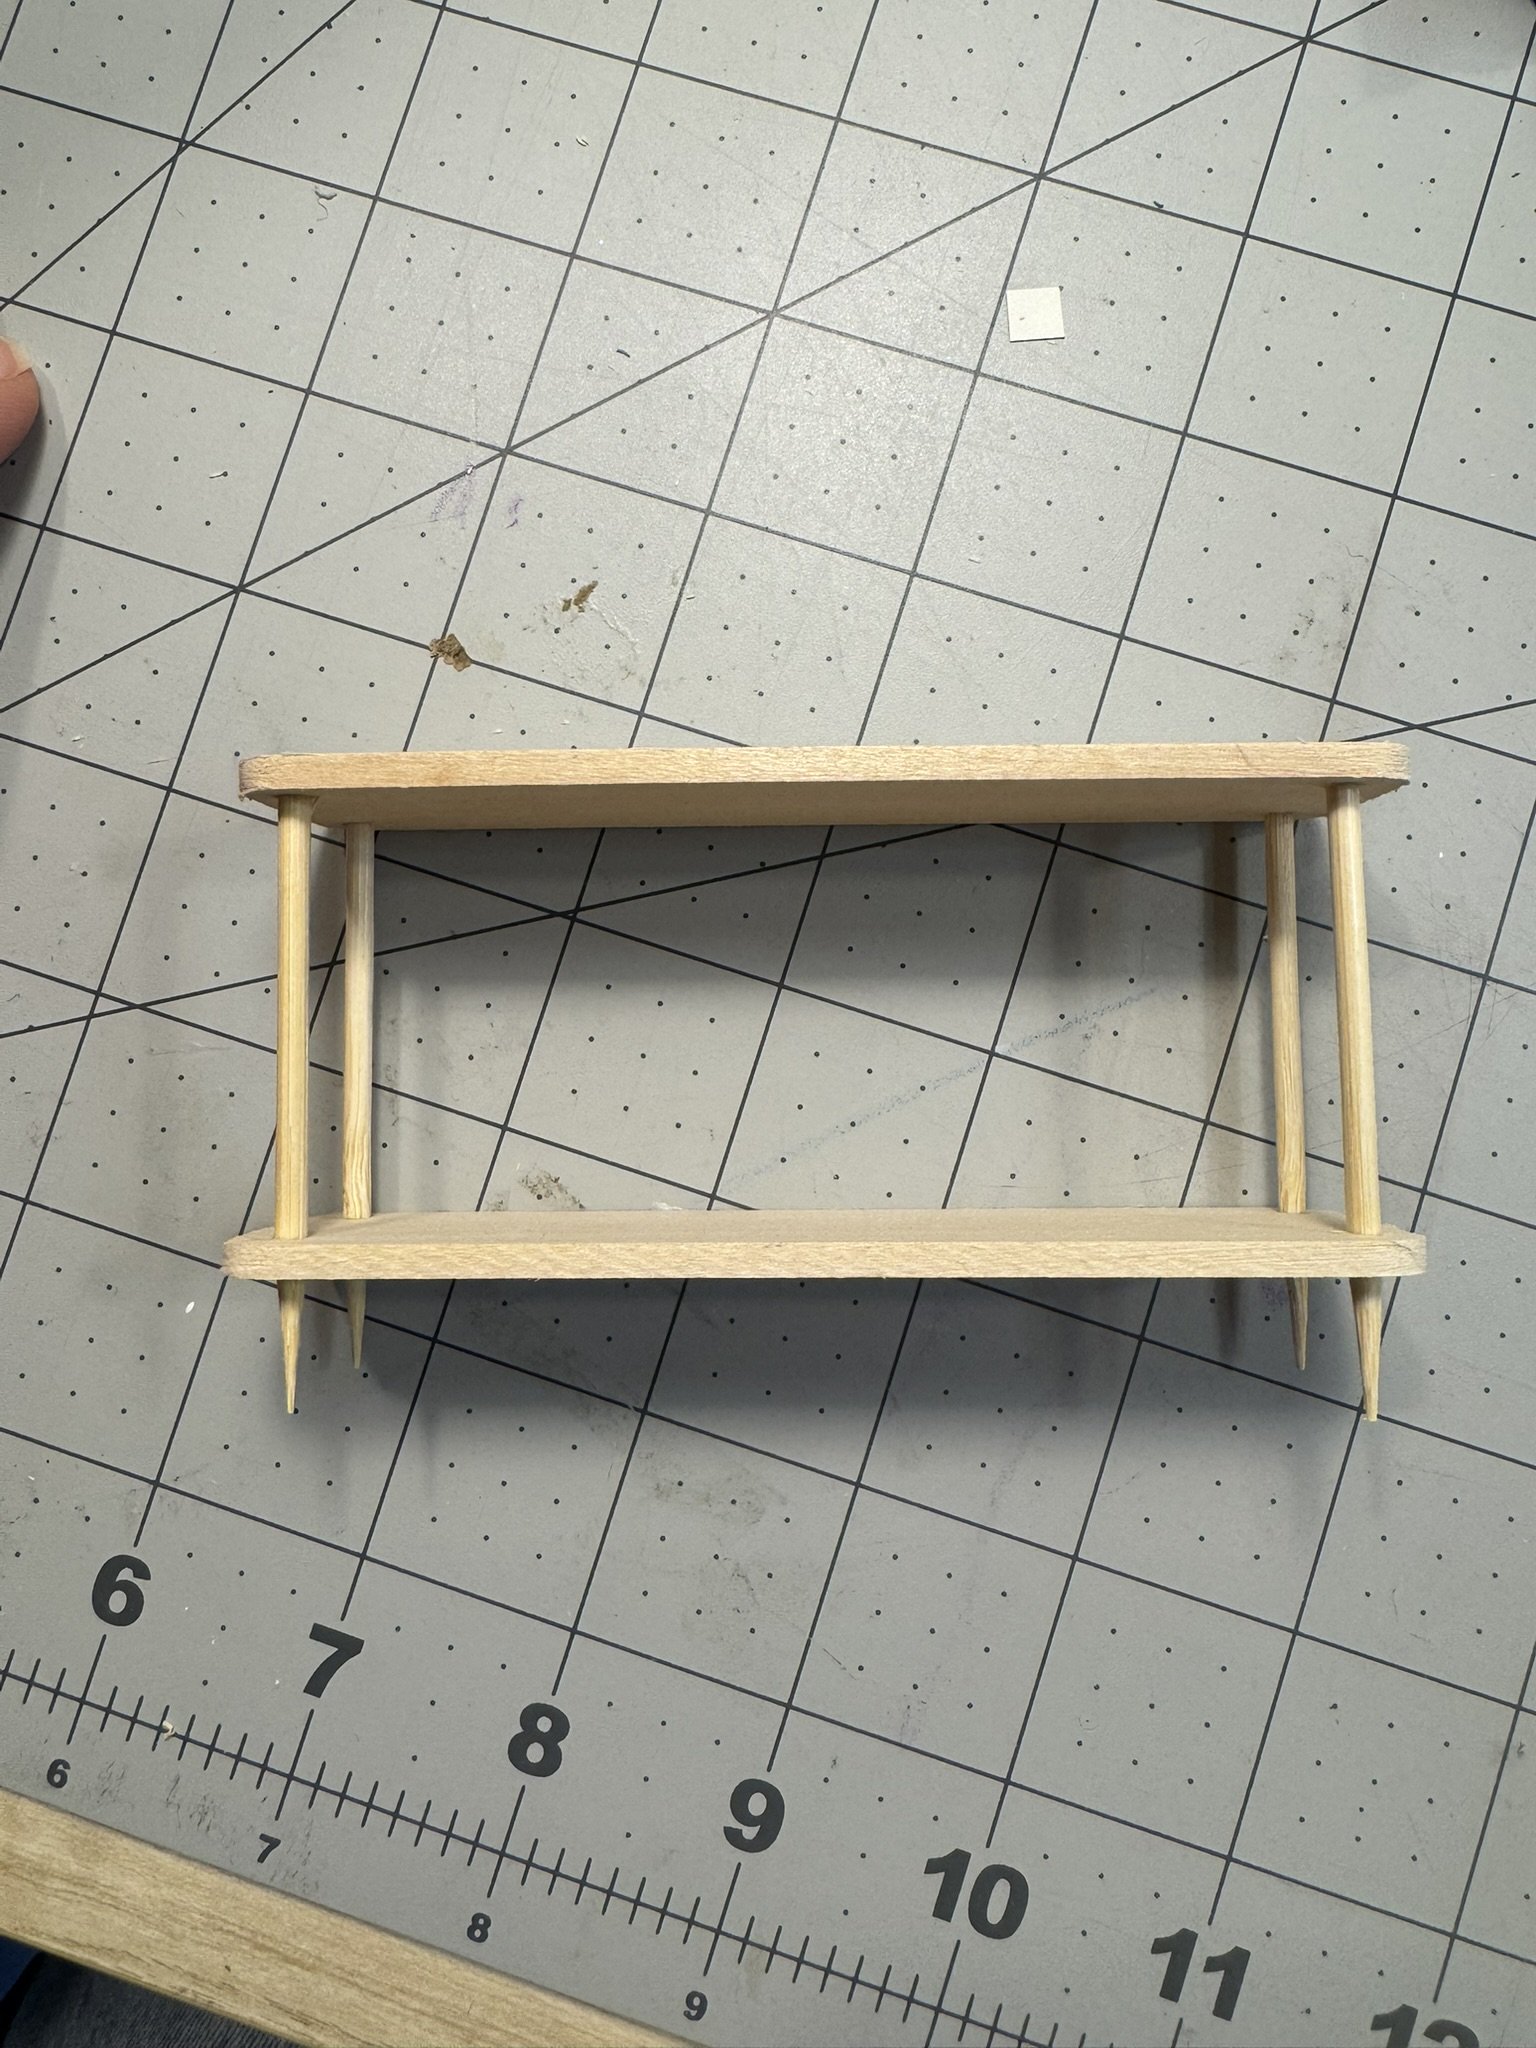
Now it’s time to assemble your table! Slide the skewers through the top of the table and make the skewers and tabletop flush. Put a dab of glue on each skewer as you pull it through. Then slide the lower shelf onto the table, adding a dab of glue at each leg. I positioned my lower shelf about 1/2” from the floor. Be sure to clean up any glue blobs that may have seeped out.
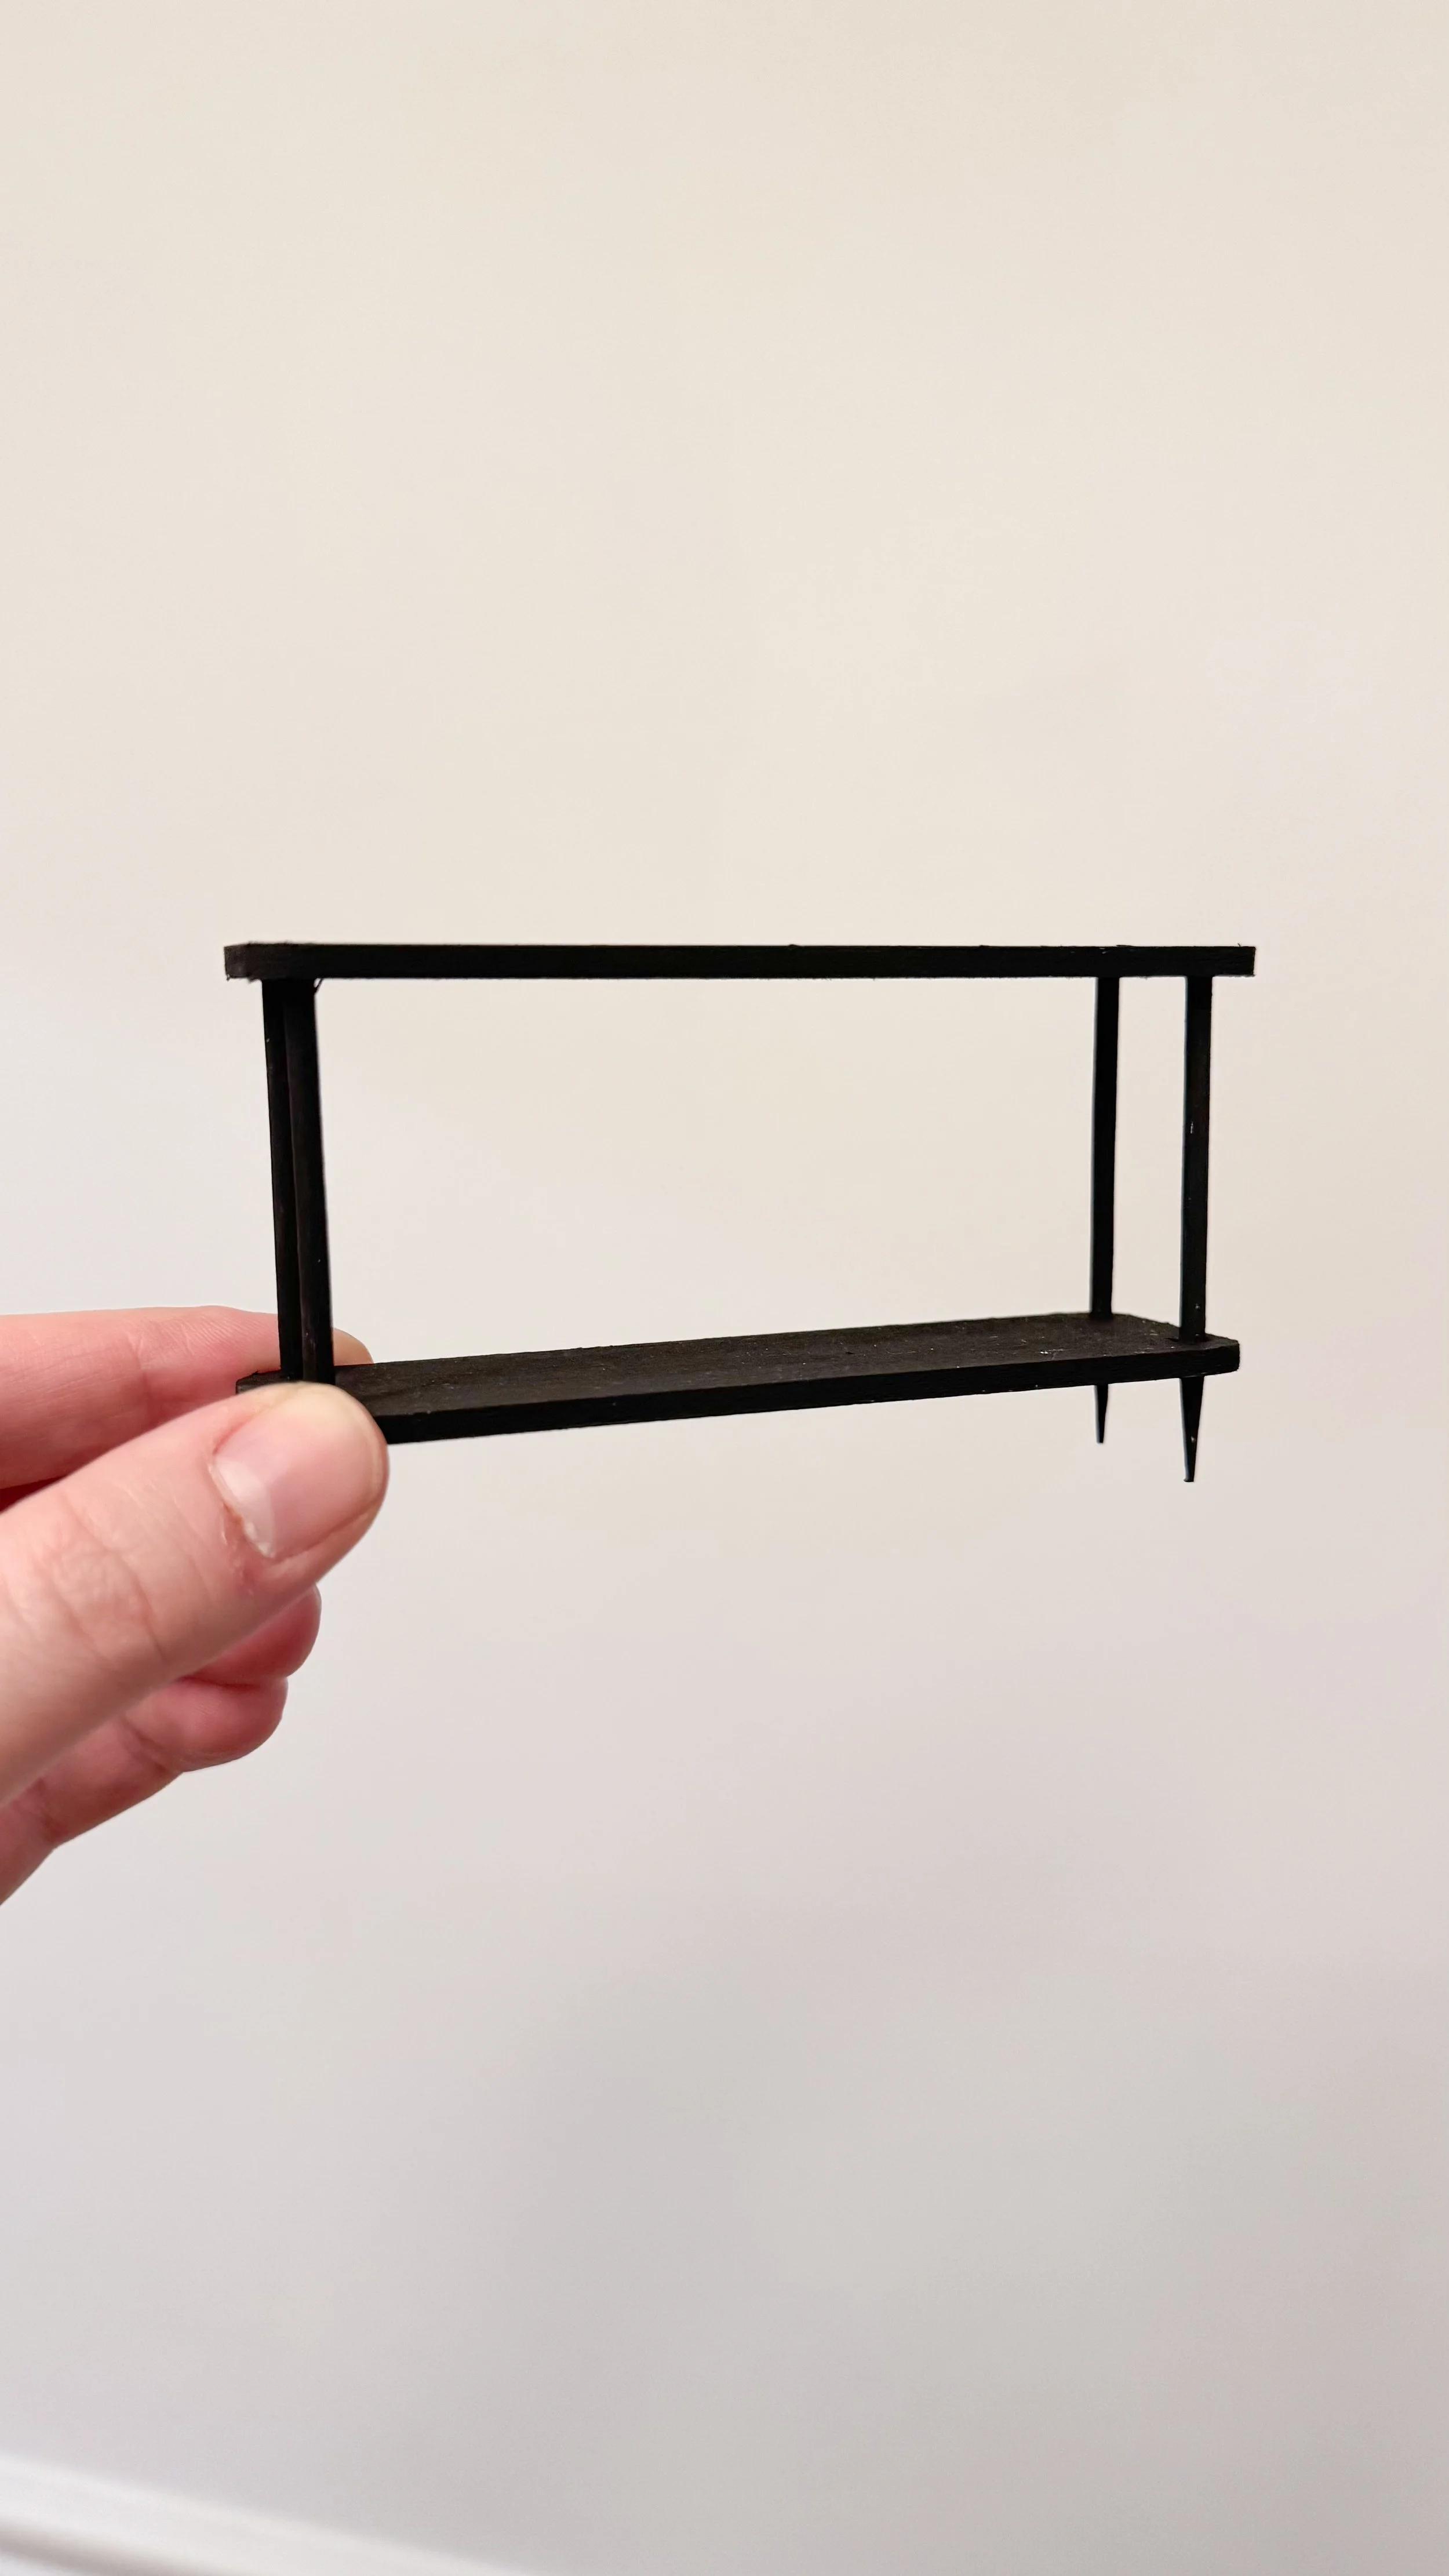
At this point you can stain or paint your console - done!
Ideas to Customize this Table
You can easily take this same structure and make it into other sizes and shapes to work in your dollhouse!
Add extra shelves to the console table style
Cut off the pointed ends of the skewers for a straight leg style
Change the dimensions of the table to turn it into a tall bookshelf with many shelves or a wider table to make a kitchen island
Make a simple desk by removing the lower shelf
Show me your creations by tagging me on social media!