Dollhouse Floor Ideas and Wall Treatments
This entry won’t be so much as a tutorial as it will be just a recap and showcase of some of the work I’ve done for dollhouse flooring and walls. When I first started with the house, I ripped out all the wallpaper, and the “builder-grade” floors were damaged from furniture being glued down. As I made the house my own, some floors were painted, but most floors were covered with a hardwood finish. Most walls have been painted, but I did include some wainscotting in the bedroom and a wallpaper mix in the child’s room.

Hardwood Floor Ideas
Materials
Iron-On Wood Veneer Edging (various wood types available like Oak, Birch, Maple)
Iron
Wool Ironing Mat or Ironing Board
Cardstock or Posterboard
Other supplies: scissors, ruler, wood stain if desired
I’m not sure who I first saw use wood veneer for dollhouse flooring, but I’m positive it’s not an original idea. Wood veneer is great because it comes with glue backing already included, and you can cut each plank as wide or long as needed. Super versatile!
I typically cut my strips 3/8” wide and 6-7” long using a paper trimmer or X-acto blade. Glue (by ironing) your veneer strips onto a cardstock or posterboard template that fits your room size. I like using a tabletop ironing mat like a wool mat so I can keep working in my chair with all my supplies handy.
I’ve done a herringbone wood pattern for the living room floor and simple straight planks in other rooms. One roll of wood veneer allowed me to do 4 floors, and I have plenty left over.
The wood can be stained if desired, although I’ve opted to keep mine unfinished since I like the look of it.


Tile Floor Ideas
Materials
Photo of a tile, texture, or pattern
Cardstock
Other supplies: paper trimmer, scissors, ruler, foam paint brush
I did one tile floor in my dollhouse for the bathroom. I wanted a little texture on it — more than simply purchasing a tile floor texture from Etsy and gluing down paper.
I found a terrazzo floor texture online and printed it onto cardstock. I then cut 1/2” x 1/2'“ squares, and glued them down onto a cardstock template. I went over the entire floor with a couple coats of Satin Mod Podge to give the paper a bit more protection and shine.


Wainscotting Wall Treatment
Materials
1/8” x 1/8” square wood dowel rod for chair rail
Paint
Other supplies: ruler, paint brush
For the dollhouse bedroom, I needed a statement wall. Wainscotting in a real house is intimidating. Wainscotting in a dollhouse is still intimidating, but less so, and with much less to lose! Using miter scissors at a 45 degree angle, I cut strips to make rectangle boxes. The math was a little bit tricky, and I mostly eye balled it to make sure things were centered and straight.
I added a chair rail to run horizontally along the room and painted everything the same color. Don’t forget to add baseboards and crown molding for a finished look.
Mini Tip - Paint your base wall first before adding wainscotting for a more even finish. Then do a second coat once the trim pieces are all added.


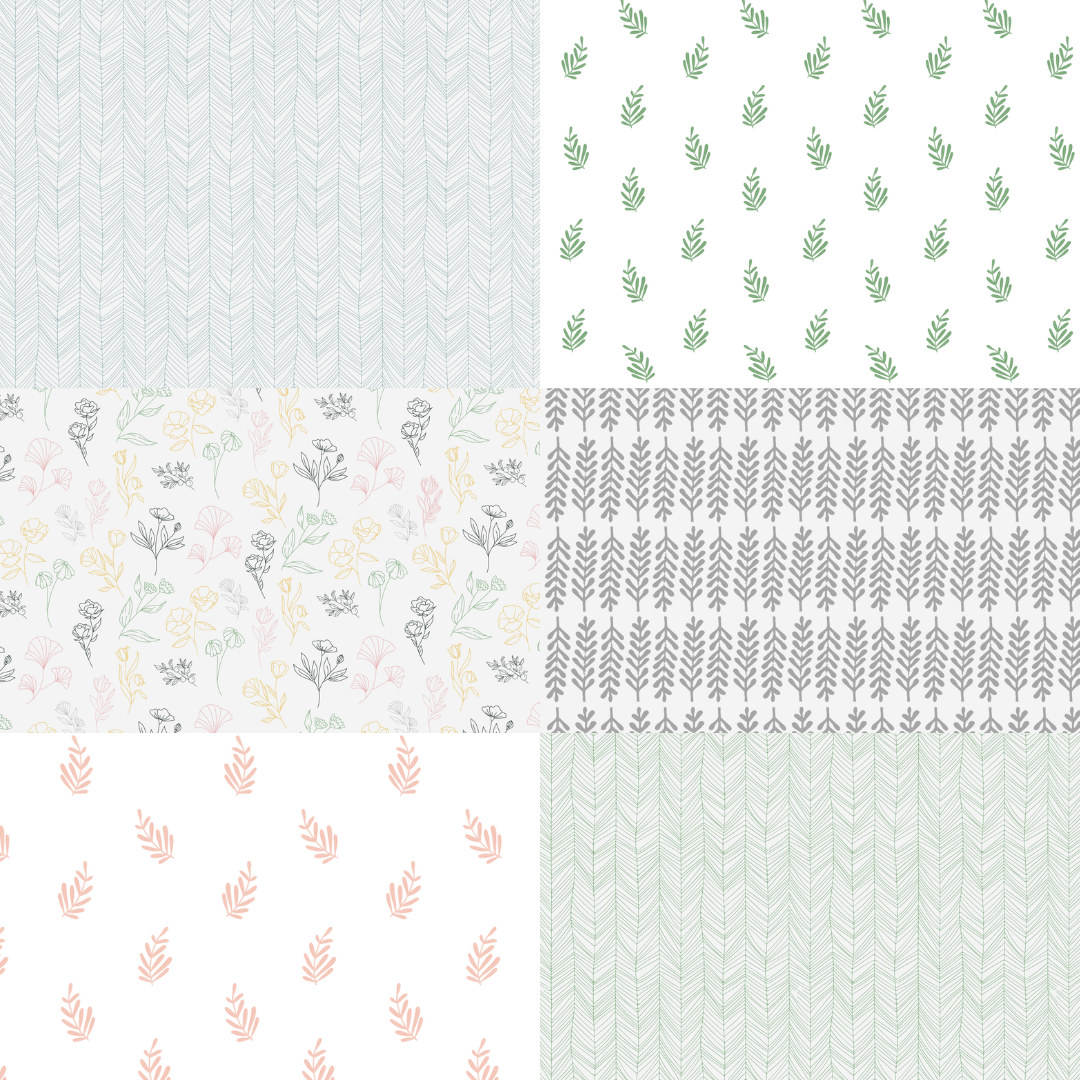
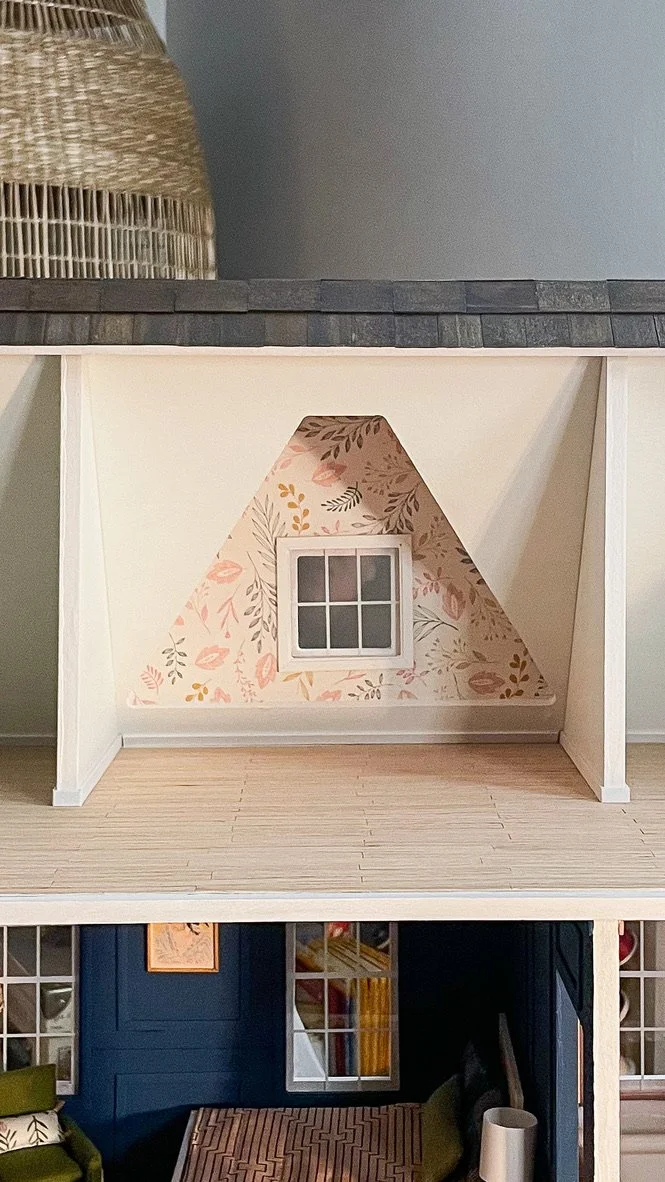
Wallpaper Ideas
Wallpaper is a dollhouse staple! Hard to believe I only used it on one room. Both of these examples below are from packs of scrapbook paper from Hobby Lobby. I made a paper stencil of my walls before cutting into the pretty paper. Once you have your pieces cut out, glue it onto the wall using a very thin but even amount of tacky glue.

And last but not least, a simple coat of paint certainly goes a long way. Either on a wall or the floor, paint is a tried and true way to freshen up any space.
Follow along on my dollhouse journey on Instagram to get more tips and updates on my progress!