Dollhouse Leather Sofa Tutorial, Arhaus-Inspired

After making a couple of fabric covered chairs and sofas (see this and this tutorial!) I decided to try out a leather dollhouse sofa. In some ways, leather is a lot easier than fabric since you don’t need to worry as much about folding or sewing. The leather instantly gives any couch style an upscale look! However, leather can be unforgiving if mistakes are made. So take it slow and buy extra fabric.
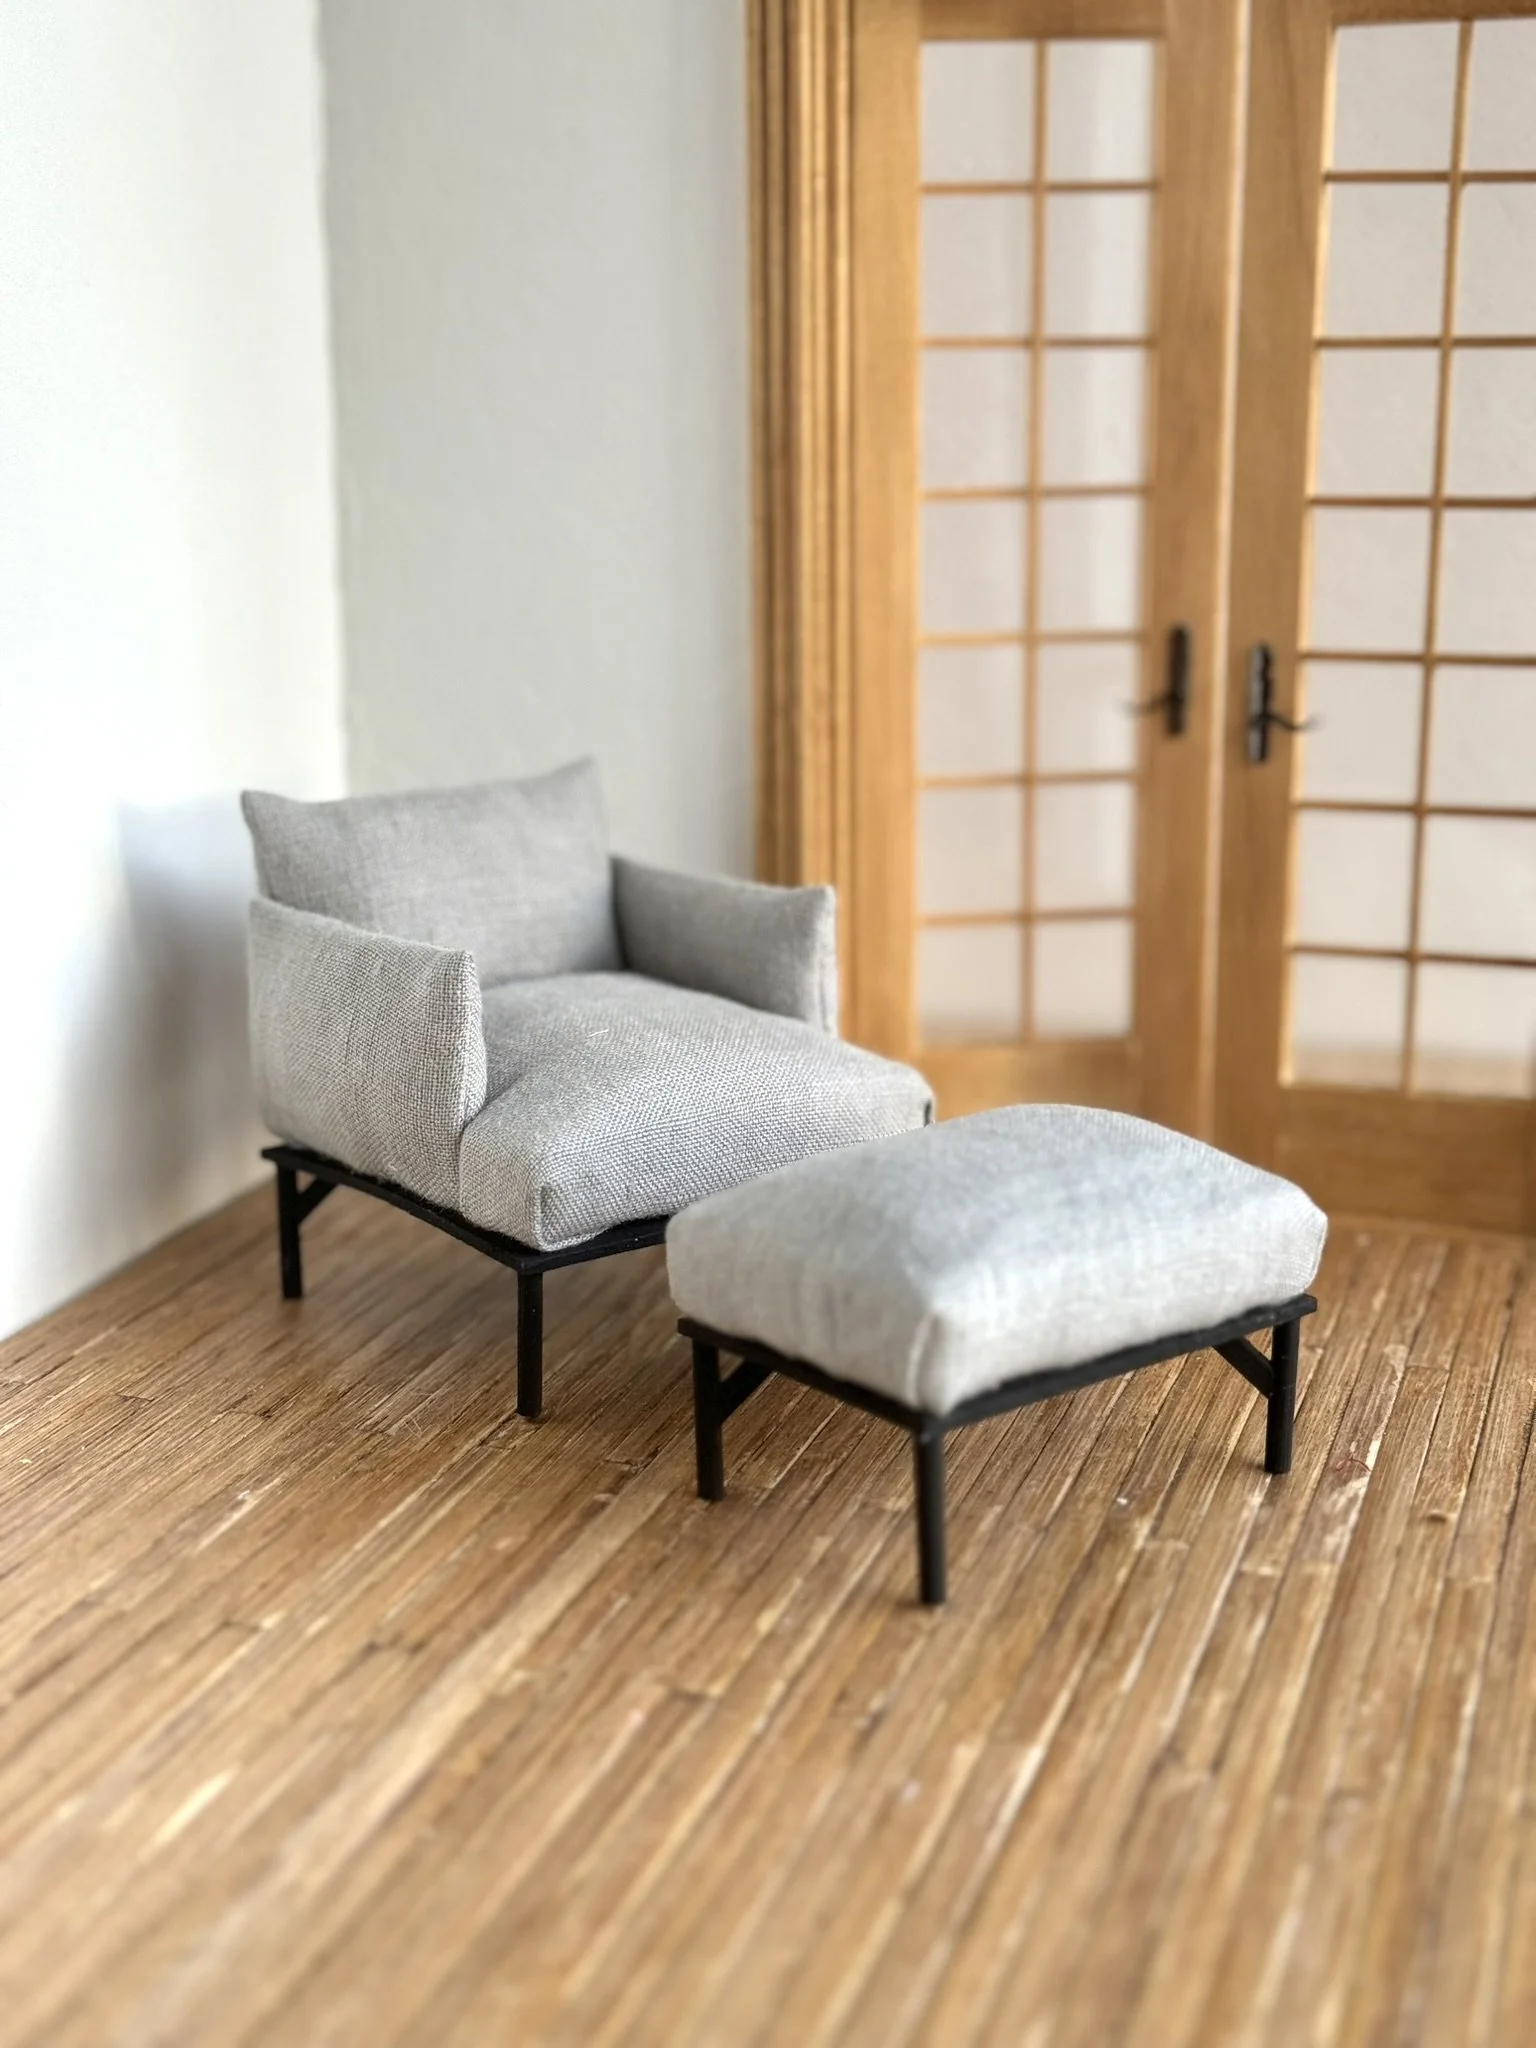
I am basing this sofa on this stunning leather design by Arhaus. The leather stitching was what drew me in, and the simple silhouette seemed do-able! Let’s get into it.
Materials
Foam core board (about 1/4” thick)
Leather/Vinyl Pleather fabric (faux leather is much thinner and easier to work with, not to mention cheap!)
1/8 x 1/8 strip wood (or wood dowels) - for the legs
Hot Glue
Mini DIY Leather Couch Tutorial
The sofa base is made from foam core board. You can purchase this at most hobby stores or even grocery stores in the school supply section. It should be about 1/4” thick.
Mini Tip - Cut foam core easily with an X-Acto Knife or box cutter blade.
Foam Core Cut List
6 5/8” x 2 5/8” for sofa base
7” x 2” for sofa back
2” x 2 5/8” for arms, cut 2
2 3/8” x 6 3/8” for seat cushion
6 1/4” x 1 1/8” for back cushion
2 1/16” x 1 1/8” for arm cushions, cut 2
Assemble the sofa base by gluing the back piece to the base. The base should be glued to the outside, back edge of the base, not the on top. The arms should fit just along the sides and meet flush with the back. I used a tacky glue in this step so that I could adjust any flush edges as needed while the glue dried. I did not cover any of the base sofa in batting (save the batting for the cushions.)


Next you will cover all 4 of your cushion pieces with a layer or two of quilt batting. I used about 2 layers on the seat, but only 1 layer for back cushion and arms. Wrap the batting around the long sides of each cushion, and cut the short sides flush with the edge of the boards.


It’s time to start covering your sofa base and cushions with leather finally! I found a warm-colored, faux leather at Hobby Lobby on sale for $8.99/yard. You only need about 1/4 of a yard, and you’ll have plenty for this sofa plus a couple more projects. I cut out a couple of rectangle scraps to cover each section. I suggest cutting the scraps too large and then trim down as you go.
I added stitching detail to mimic the Arhaus sofa. I drew two parallel lines on the fabric backing spaced about 2 inches apart. I sewed a line in matching thread with my sewing machine. This step is optional.
Start by covering the front edge of the sofa base with leather. This piece can be trimmed to fit exactly inside the base and fold underneath to the bottom of the sofa. I used hot glue to secure the leather to the foam board.


Cut some smaller leather scraps to cover the arms. Start on the inside edge and fold over the outside arm to the underside of the couch. Trim the leather flush to the inside edge of the arm, but leave about 1/4” of leather overlapping the outer arm edge. You will fold this extra flap over the front edge of the arm. Cut all fabric edges so they butt up against each other and do not overlap. You may have to do a slight miter edge on the underside of the couch where fabric wraps around the corner.
Repeat on the other arm.


To cover the back of the sofa, start again by gluing a piece flush to the inside corners. You will want your back leather to be slightly wider than the inside measurement so that it can wrap around the outer corners. Cut notches in your leather so that the inside can sit flush, but you have extra fabric on the back of the couch. See photos below.
The fabric covering the back will need to wrap over the arms slightly and be cut flush to your arm pieces. See third photo below of a side view of the couch.


One of the hardest parts is trimming fabric on the underside fabric so there is no overlap. Multiple notches were required! See detail photos below.


Leather Sofa Cushions
The hardest part is over, thank goodness. Now for the cushions. You should have already covered the cushion pieces in quilt batting. Simply wrap your fabric around the cushion and secure with hot glue to the back. Trim the lower edges flush with the base, and leave a leather fabric flap on top. Cut some slits and notches on the ends (photo 3), and fold the short ends down first, then cover with the longer flap.


Cover the back cushion and two arm cushions using the same method. You can then glue each cushion in place to the sofa base.


Sofa Legs
For my sofa, I decided to make a simple straight leg style. In the past, I have had trouble getting the legs to sit flush and straight down. So, to remedy this, this time around I made a U-shape leg that braces the front and back paired together. This gave it some extra stability and more surface area for the glue to adhere instead of gluing a tiny stick leg straight onto the bottom.
Basswood Cut List (1/8 x 1/8” square strip dowel):
(2) 2 1/4” long
(4) 1/2” long
Glue 2 of the 1/2 inch pieces onto the ends of a long strip at a 90 degree angle. See photos below. I stained my sofa legs dark brown to match the leather.
Use e6000 glue to adhere the legs to the bottom of the sofa. I tried both tacky glue and hot glue and both times the legs peeled off too easily.


Now your sofa is done! Be sure to tag me in any of your mini creations on social media if you make this leather sofa! Good luck in your mini makes!